Disclaimer: This blog is for general informational and inspirational purposes only, based on publicly available information and personal insights. Images—whether of models, screenshots, or products—are for illustrative purposes only and do not depict actual subjects, scenarios, or views described. We do not intend to offend or conflict with any societal, cultural, religious, or political values.
Let’s have some Learning Point Where is Image Trace in Photoshop?
Image trace is the conversion procedure of an image from raw raster to editable vector using different photoshop tools. Using the image trace function, you can turn your drawing sketch on paper into vector artwork and establish a fresh sketch on a current painting by tracing it. Now, the question is, where is image trace in photoshop?
You have probably already visited multiple pages to search for the answer and are currently reading the blog with the same purpose. If so, you are on the correct page to get the most efficient solution. So, let’s jump into the details without beating around the bush to get the answer.
Designing Files for Image Tracing: Where is Image Trace in Photoshop
There is a saying, “A stitch in time saves nine.” Therefore, before you jump in tracing an image, you must disburse time amending the photos. As a result, you can experience a faster and effective tracing process. You also won’t face any challenge to edit the outcome after doing tracing.
The tracing process doesn’t provide a sound output for 1-bit-pictures, but it can work well for a gray color photo. Remember that the tracing process will pop up warnings for files more than 1500 pixels and can work slowly.
It’s mandatory to delete all unwanted objects like dust, background, spot, etc., from the image utilizing different photo editing processes like Clipping Path Service, Photo Cut Out Service, background removal service, etc. You may also need to crop a layer in photoshop before starting tracing. If you want to know how to crop a layer in photoshop, you can visit another blog on this. And do you really know about what is clipping in photography?
Steps to Trace an Image in Photoshop
Let’s learn the magical steps to create authentic line art with the trace.
- Select an image to trace.
- Create a new mint file in Photoshop and open the image.

This image is used solely for informational & illustrative purposes. We do not intend to offend or conflict with any societal, cultural, religious, or political values. All trademarks, logos, and content remain the property of their respective owners.
- Click on Layer>Duplicate Layer>OK
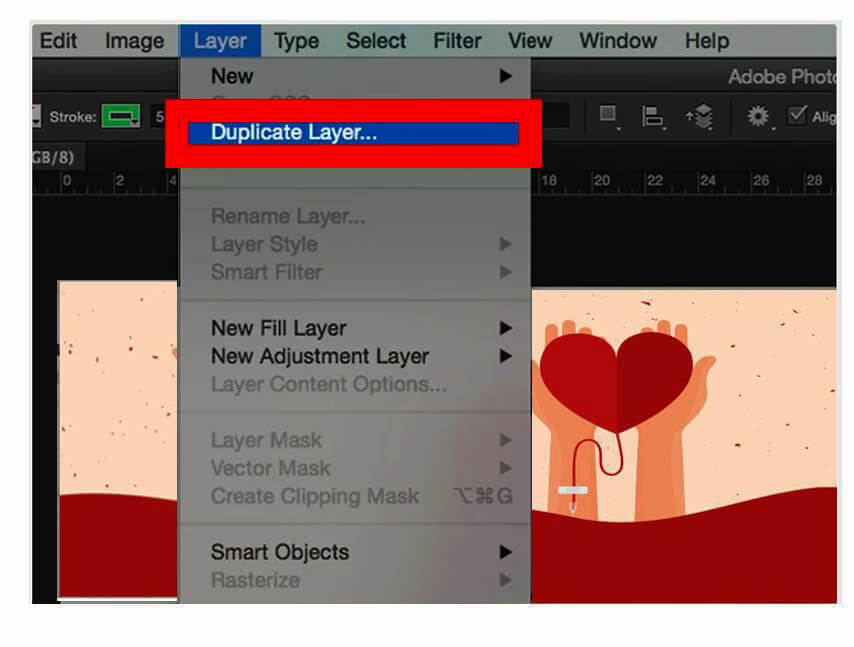
This image is used solely for informational & illustrative purposes. We do not intend to offend or conflict with any societal, cultural, religious, or political values. All trademarks, logos, and content remain the property of their respective owners.
- Rename and change the new layer’s opaqueness up to 25% to gray out the layer so that you don’t feel challenged to differentiate.

This image is used solely for informational & illustrative purposes. We do not intend to offend or conflict with any societal, cultural, religious, or political values. All trademarks, logos, and content remain the property of their respective owners.
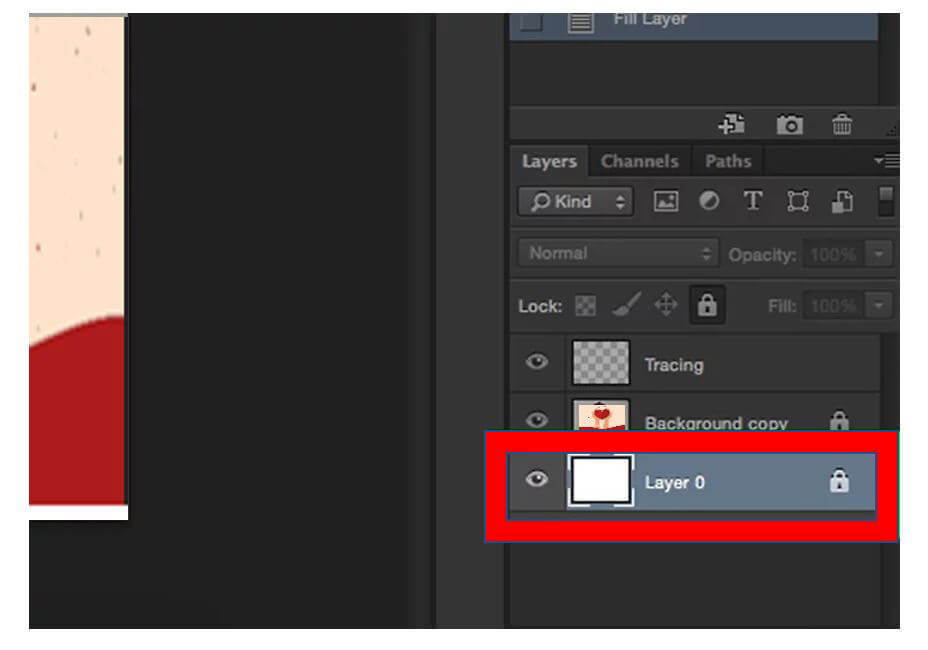
- Pack the layer by selecting the padlock sign.
- Create another layer from Layer>New>Layer and rename it. Now, you have three layers named Tracing, Background, Layer 0.
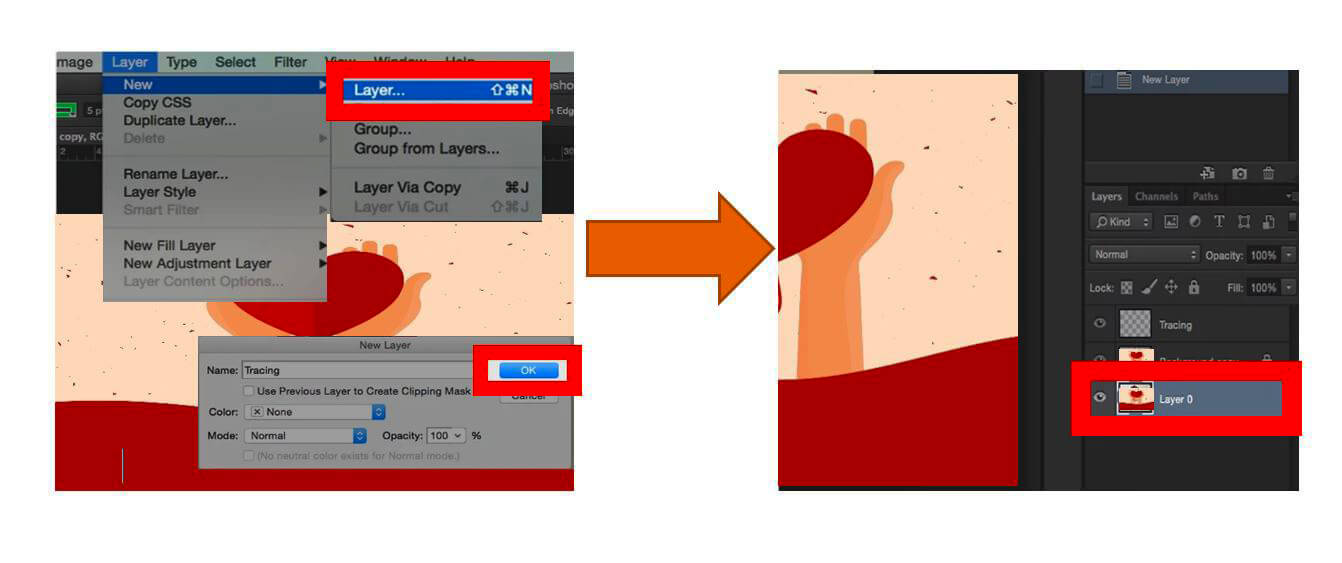
This image is used solely for informational & illustrative purposes. We do not intend to offend or conflict with any societal, cultural, religious, or political values. All trademarks, logos, and content remain the property of their respective owners.
- Selecting the layer tagged “Background,” Hold Ctrl + Backspace on the keyboard to fill the layer with a white background.
- Check if the tracing, locked, and white background layers are in sequence. If not, arrange by dragging.
This image is used solely for informational & illustrative purposes. We do not intend to offend or conflict with any societal, cultural, religious, or political values. All trademarks, logos, and content remain the property of their respective owners.
- Zoom in to detect the accurate component level and set the cursor to the portion wherever you want.
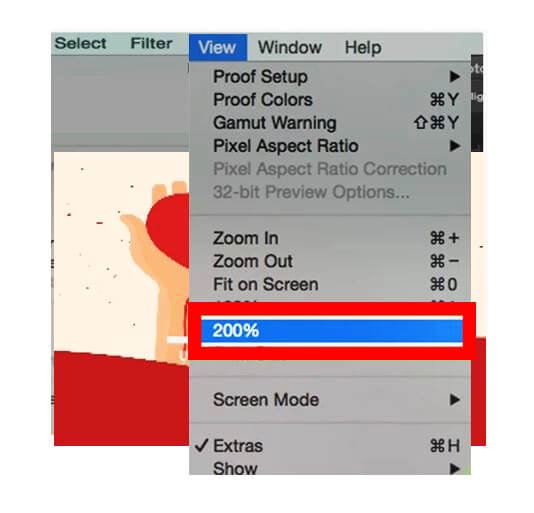
This image is used solely for informational & illustrative purposes. We do not intend to offend or conflict with any societal, cultural, religious, or political values. All trademarks, logos, and content remain the property of their respective owners.
- Don’t worry about the original file if it is not clear. Instead, focus on the new layer since you are just using the original file as a guide to work on the new one. However, it would be a concern if the original file is too teeny. In this case, you should resize it before copying it.
- Hit the paths tab to construct a new path.
- Employ the Pen Tool to outline the required cues from the photo.
- As you can adjust the points later, don’t be upset if you fail to outline perfectly.
- To change any anchor point, you have to hold the Ctrl key on the keyboard that will transform the mouse pointer into the select tool.
- Move the anchor points and convert your tracing into a new creation.
- When you obtain a basic path according to your preference, copy it and rename it.
- Hide the original image layer by clicking on the eye icon beside the layer
- Move to the layer where you want to continue working.
- Pick the Path Selection Tool holding the shift key on the keyboard to fix all the paths you want to paint. You can pick any color according to your preference.
However, the tracing process is lengthy and tricky. Since you are not professional, your outcome may include clipping that is not expected in a splendid photo. To trace the picture appropriately, you can take help from Cut Out Image.
Convert the Traced Outcome to a Live Paint object
After tracing, it’s time to utilize the result. If you are satisfied with the outcome, you can convert it into live paint or other paths to use in vector artwork. Remember, you can’t adjust the traced object once converted to other forms.
- Choose the tracing outcome.
- If you want to utilize the traced object as an individual, you need to convert the tracing to a path. Select the “Expand” command from the control panel.
- If you want to convert the traced object to paths keeping the existing array, click on the object, go to the “Live Trace” option and select “Expand.” It will group the paths preserving the current traced object as a guide.
- Now, select Object, go to “Live Trace,” and click “Convert To Live Paint.” It will convert your tracing to live paint. You can apply fills and strokes on your traced piece from the “Live Paint Bucket” tool.
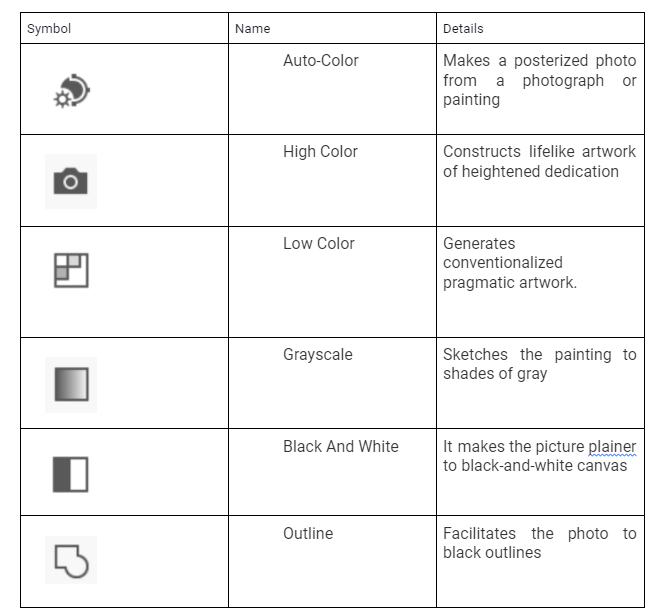
Know Tracing Presets
After opening the photo in photoshop, you can quickly locate the trace panel option. Then, you can open the door of fundamental functions from the panel’s top portion. You also can operate more additional options by spinning the triangle adjacent to the Advanced label command.
By selecting one of the available presets, you can fix all variables required to construct expected tracing results.
More presets are available from the drop-down menu located at the top.
View: It defines the view of the traced thing. You can view the traced image, original image, shapes, and other available options with this option.
Mode: It appoints a shaded method for the traced outcome. Available options are as below:
- Color: It sets the color number you want to use in the traced result.
- Grays: It fixes the grays number you wish to use in the grayscale traced effect.
- Threshold: Converts pixels in developing a black and white tracing impact from the actual photo.
Palette: Defines a color palette forge a color or grayscale tracing. Below options are available under the palette:
- Automatic: Depending on the photo, it switches the limited palette and whole hue during tracing. With this option, you can modify the pigment too.
- Limited: Employs a small-scale set of pigments for the tracing palette.
- Full Tone: The best option utilizes the whole collection of colors for the tracing palette.
- Document Library: Operates the current color set for the tracing palette. It also allows you to pick any color according to your preference.
Advanced Options are:
Paths: Handles the gap bounded by the traced shape and the actual pixel shape.
Corners: Defines the focus on corners and the possibility of turning into a corner point from a sharp bend.
Noise: It notices the ignored pixels at the time of tracing. The higher the resolution, the lower the noise.
Method: Offers method options for tracing. You can choose Abutting or Overlapping for tracing. Abutting produces cutout paths, whereas Overlapping constructs stacked paths.
Fills & Strokes: Fill generates filled regions, and the strokes generate the stroked paths in the tracing result.
Snap curves: If you work with a geometrical logo or picture, using this option, you can identify if any curved line got replaced with a straight line.
Use of Traced Image
The everyday use of image trace is to convert a raw file from JPEG, PSE, or PNG format to vector format. Another benefit of image tracing is to apply the traced object as the foundation of drawing on the current piece of artwork. Here, the existing painting acts as a guide to create multiple versions of the main thing. For example, you have drawn a picture on paper using a regular pencil. But you need to transform it into a digital one. You can do it using the image trace process, where you will convert it into vector work from the paperwork. Isn’t it interesting?
You can also produce various versions of this paperwork using different tracing presets.
Limitations of Tracing to be vectorized
If you need to vectorize the final output, it’s better not to use specific images containing issues as below:
Geometrical figures: If the image, logo, symbol, etc., are geometrically shaped like triangles, rectangles, etc., you can trace manually. Because human eyes may not recognize any fault in the form even if it is not appropriately compressed in different image formats. However, software like Photoshop can identify many pixels even if the file is in the best result.
Words: If you need to vectorize a traced picture of a text, it’s better to identify the font name. Then type it in a photoshop text file and do initial formatting.
Complex Artwork: Since you need to compromise the picture amid actual effects and smooth paths, as a result, the attributes get lost. However, it would be best if you emphasized the smooth paths instead of the details.
Please note that you can’t expect high-quality vector work results if you use a little GIF.
Is tracing good or bad?
Tracing is an old technique for making artwork. In general, tracing is nothing but the process of outlining an artwork to create a new painting that adds vivid flavor.
Some believe it is good, whereas others believe it is illegal since artwork should be unique. Hence, tracing is neither good nor bad. But, it would be unlawful if anyone applies it violating the copyright.
Consequently, the process becomes unethical when someone traces another person’s work and claims it as his creativity. The incident is most familiar in an online platform where an artist publishes his composition online. Some other people copy to trace without any permission and sell their work.
An artist can protect the artwork utilizing the copyright that avails a lifetime of up to 70 years. Therefore, it is ethical only if you trace an old painting from the general discipline. It is also virtuous to trace your creation by yourself for adding various appearances.
Therefore, you should copy or trace copyright-free photos instead of trademarked photos to avoid illegal issues. If you search on google, you can find such pictures on different websites like unsplash.com, pixaby.com, pexels.com, etc.