Disclaimer: This blog is for general informational and inspirational purposes only, based on publicly available information and personal insights. Images—whether of models, screenshots, or products—are for illustrative purposes only and do not depict actual subjects, scenarios, or views described. We do not intend to offend or conflict with any societal, cultural, religious, or political values.
Adding effects and filters on your phone is an exciting thing to do. Instagram, as you all know is a superb app with loads of stunning features. If you have proper knowledge of how to create Instagram effects in Photoshop, it is a pretty simple task. Follow these quick and easy steps to achieve awesome create Instagram effects:
Open a Nice Photo
Choose a good picture firsthand if you wish to apply a nice effect.
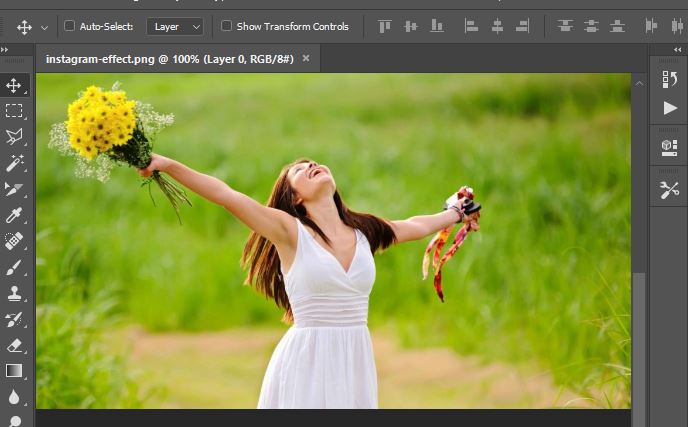 This image is used solely for illustrative purposes. We do not intend to offend or conflict with any societal, cultural, religious, or political values. Image Source: Shutterstock
Square Crop the Image
Neither it is landscape nor portrait but it is square. Square is the new type of crop that crops the image in a square shape. It is a challenging task because, for this, you have to pick the crop tool and then hold the shift key down as you click. Next, drag out the crop area and hit Enter.
 This image is used solely for illustrative purposes. We do not intend to offend or conflict with any societal, cultural, religious, or political values. Image Source: Shutterstock
Create Curves Adjustment Layer
Now, to add the processed look, create a curve adjustment layer. To achieve a perfect Instagram effect, it is important to play around with little adjustments.
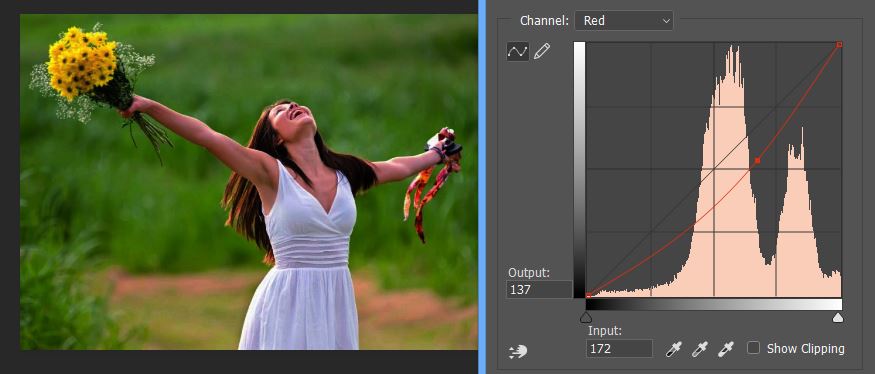 This image is used solely for illustrative purposes. We do not intend to offend or conflict with any societal, cultural, religious, or political values. Image Source: Shutterstock
Vignette Effect
The vignette effect adds realism to the Instagram look as it gives a darkened look to the edges of a photo. You might have seen the vintage pictures where the edges are dark and the vignette effect is the exact same. Work on the Curves adjustment layer that you have created in the first step.
Use a large soft black brush on the adjustment layer mask for painting a circle. Make sure to paint a circle in the image center to achieve the look. Once when you are done, you will see that only the outer edges of the photo have the effect whereas, on the mask, only white appears. Now tweak the RGB curve below to get the desired vignette look.
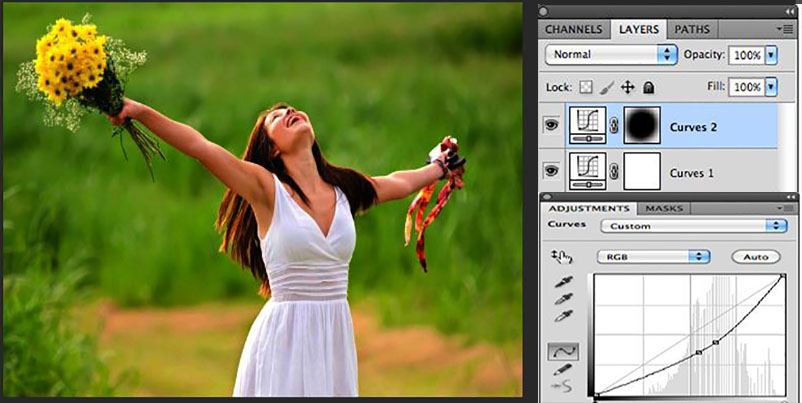 This image is used solely for illustrative purposes. We do not intend to offend or conflict with any societal, cultural, religious, or political values. Image Source: Shutterstock
Blur the Edges
The next step to give a more natural look to the vignette effect is by blurring the edges around the subject. The size and focus area can be controlled in the settings.
Duplicate the image layer and create a layer mask. Apply Gaussian blur from the filters option. Got o Filters>Blur>Gaussian blur to get the effect. Then, fill in the details as of how much area you want to blur. Next, use a soft black brush on the layer mask as you did in the previous step. It is for the purpose to take the area in focus that you want people to notice immediately while looking.
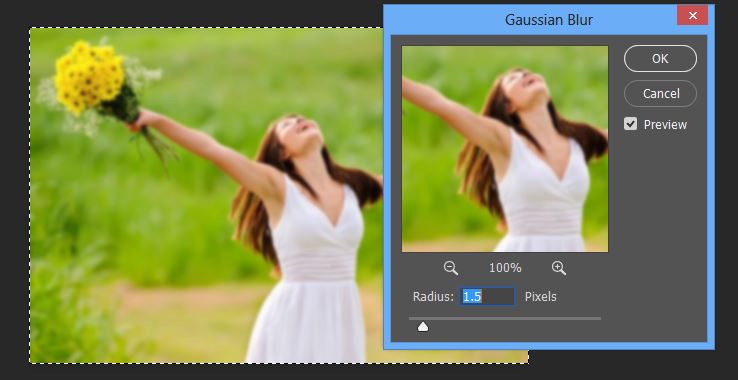 This image is used solely for illustrative purposes. We do not intend to offend or conflict with any societal, cultural, religious, or political values. Image Source: Shutterstock
Border Adding
Put a border around the image to get the real Instagram effect. Although it is optional, you can add a beautiful border to spice up the image a bit more. To do this, pick the Rounded rectangle tool from the tools palette and draw a rectangle in the center of the image while holding shift key.
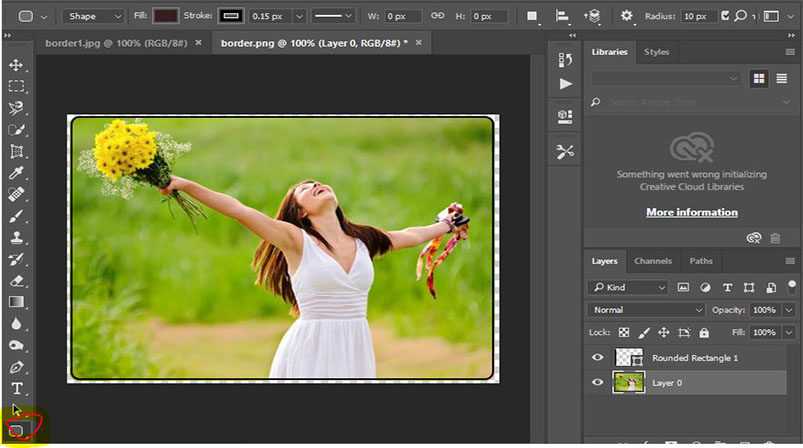 This image is used solely for illustrative purposes. We do not intend to offend or conflict with any societal, cultural, religious, or political values. Image Source: Shutterstock
It will create a vector shape so to create a selection, press Ctrl+click. Then, create a new layer again on top of all the layers and press Ctrl+shift+I as it will invert the selection. Hit D and X to reset the colors and also make the foreground white. Lastly, to fill the selection, pick the paint bucket tool and fill the color.
Delete the vector shape layer afterward.
Isn’t it so much fun? Try it!
#create Instagram effects
