Disclaimer: This blog is for general informational and inspirational purposes only, based on publicly available information and personal insights. Images—whether of models, screenshots, or products—are for illustrative purposes only and do not depict actual subjects, scenarios, or views described. We do not intend to offend or conflict with any societal, cultural, religious, or political values.
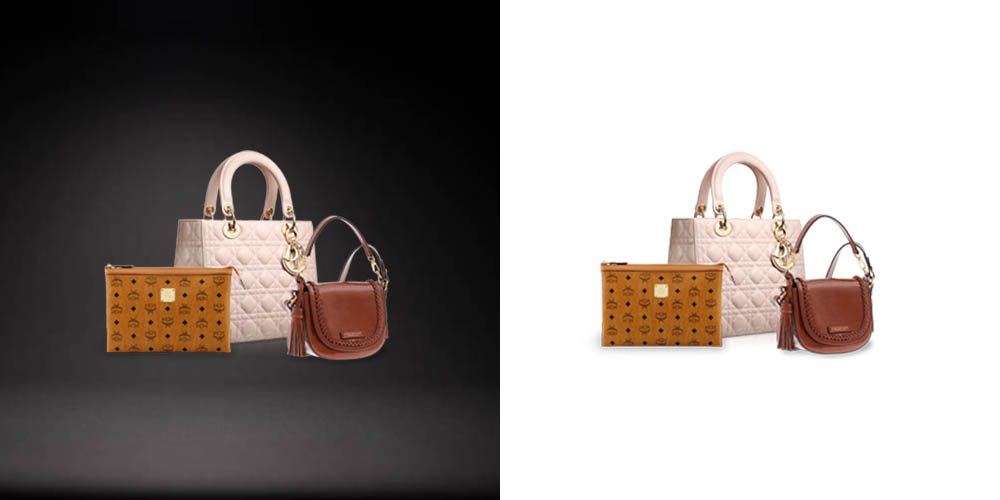
Different types of shadows are there for different types of products which you can use for giving professional and effective looks to the product images. Shadows provide high quality images which is completely worthy for web. Note that various shadow types gives different effects to the product images but the decision is in your hand. Each shadow gives unique style to the product images and gives equal benefit to the images. Just play with the different types and keeps on experimenting to get the best looks keeping in mind that you ensure consistency for your entire product inventory. This tutorial will provide you the step by step guide on how to use each shadow. So let’s have a look on the steps
- Natural shadow
This is the type which is most easy and convenient to master as it provides you the best advantage of using one single light source to get this shadow. It will add the drama to your product by appearing barely visible under the product. Steps to apply this shadow type are
- You have to first go for creation of new layer and have to fill that with white background
- Now move this to the bottom.
- Make duplicate of the layer to have two layers in total.
- Select the area and gives it the gracious look by refining the edges.
- Now it’s time to create the mask which will depend on your selection.
- Change the option of duplicate layer into multiple using the top left tab of the layer dialog box.
- Now use that multiplied layer to create the mask.
- For making everything smooth you will use feathered brush for sure and at the end flatten the layers.
- Drop shadow
This is the shadow known for giving the illusion effect of the sunlight shadow to the product. This shadow imitates this so well and gives natural and real look to the product image. This style of shadow works better on smaller items like flatter purses and clutches.
Steps are
- Compose new layer and make it fill with white background
- Move this new layer to the bottom.
- Ensure tight selection around the purse. Don’t forget to refine the edges.
- Form the mask as per the selection of the area.
- Now to open the layer style window double click the purse layer.
- A shadow will appear in the drop shadow box. Check that by opening it.
- Suit the opacity according to your preferences by tweaking it two-three times or more if you do not get the right match.
- Now you have to change the angle of the shadow so that it goes perfectly with the light source. Pay attention to this thing so that distance and size must match the direction, angle and distance of the light source.
- Click ok
- Now complete the process with layer flattening.
- Reflection shadow
The third shadow type is reflection shadow which is used by the photographers to give the image effect as it was originally shoot on the reflective surface. This adds the drama to the product image by showing vague reflection of the product.
Steps are
- First create the layer and use white background for that.
- Move this layer as suggested in above two styles.
- Create the duplicate layer.
- Select the area around the purse and refine the edges.
- Now form the mask from your selection.
- Invert the mask according to the selection like whether you have selected the background or the purse.
- Now the next step calls for rotation of the duplicate purse layer by 180 degrees in such a way that one right side up and one upside down.
- Now do the accurate alignment to make the upside down purse, the reflection of the right side up purse.
- Add the mask and use gradient tool after this. Take care of the opacity as well.
- Brush the sides and the top of the purse and tweak the adjustments to give more natural look.
- Now flatten the layers as the last step.
These three shadow techniques may look difficult to apply but once you practice them they would not take more than the minutes of your time. Thanks.