Disclaimer: This blog is for general informational and inspirational purposes only, based on publicly available information and personal insights. Images—whether of models, screenshots, or products—are for illustrative purposes only and do not depict actual subjects, scenarios, or views described. We do not intend to offend or conflict with any societal, cultural, religious, or political values.
Have you ever done scrapbooking? Have you ever done scrapbooking? Or did you make a photo collage of old magazines in childhood? Both need to cut the image using scissors and attach them to the new page using glue. Cut Out an Image is the same process as cutting an image from a source background of digital photos. Nowadays, cut out image service has become famous for their multipurpose uses. You can also find various photo cutting tools and apps. Photoshop is one of them. Today I will show How to Cut Out an Image in Photoshop.
To sum up: The blog will contain the basic idea of a cut out image and who needs it for which purpose. In this blog, I will also share how you can do it using Photoshop in different ways. I will also share a few alternative apps you can use to do it with your phone if you don’t have Photoshop software. Hopefully, you will find it an informative and learning citation. So, let’s dive into the details of how to cut out an image in photoshop:
What Is a Cut Out Image?
Cut out image, also known as a deep etched image, is a photo trimming process to isolate an object from an initial background and replace it with a new background according to preference.
As the name suggests, it is like cutting photos from magazines or newspapers to add to another scrapbook background. The only difference is that one process is for printed versions while the other is digital. You can add transparent, Solid Background Colors or another image as a background for your digital cut out image and add more visual effects to make it fantastic.
Photoshop is one of the best photo editing tools for cutting out an object from an image and reusing it in different backgrounds. You can also use the process in Photoshop to erase unwanted objects from the photo.
Based on image complexity, there are several categories of cut out images like raw, simple, medium and complex. Straight, curved, round and rectangular-shaped things are subject to raw cut out image, whereas the simple cut out image deals with more extensive curved ones with holes. Pictures with multiple curves, holes and anchor points are subject to medium cut out image, where the complex cut out image deal with the complexly shaped products with closed paths and numerous holes
How to Cut Out an Image in Photoshop
One common question is “How to Cut Out an Image in Photoshop.” This part of the blog will answer it with multiple methods. Here we will discuss various ways because Photoshop offers numerous tools and techniques for different purposes, so your next project looks impressive. Let’s know them:
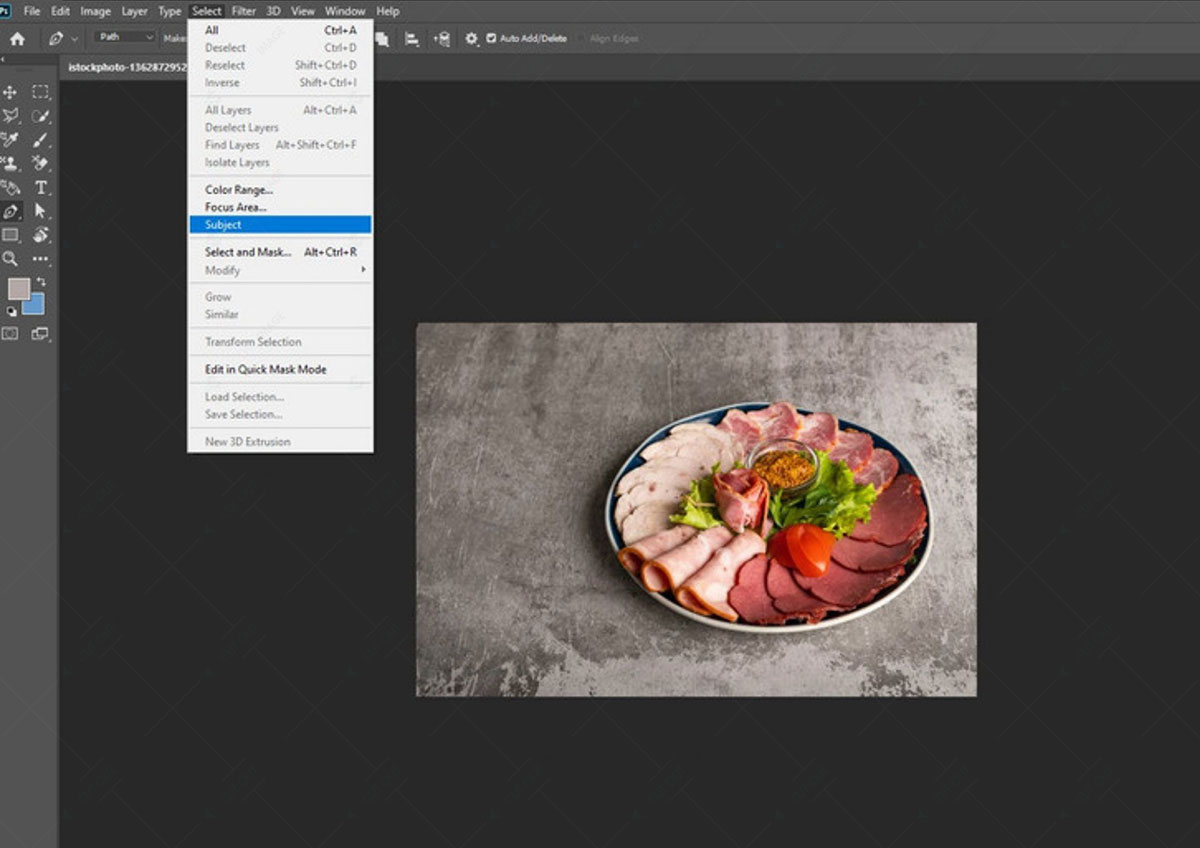
Method 1: Cut Out an Image with the Subject Selection
It is the easiest method to cut out an image in Photoshop. Let’s learn it:
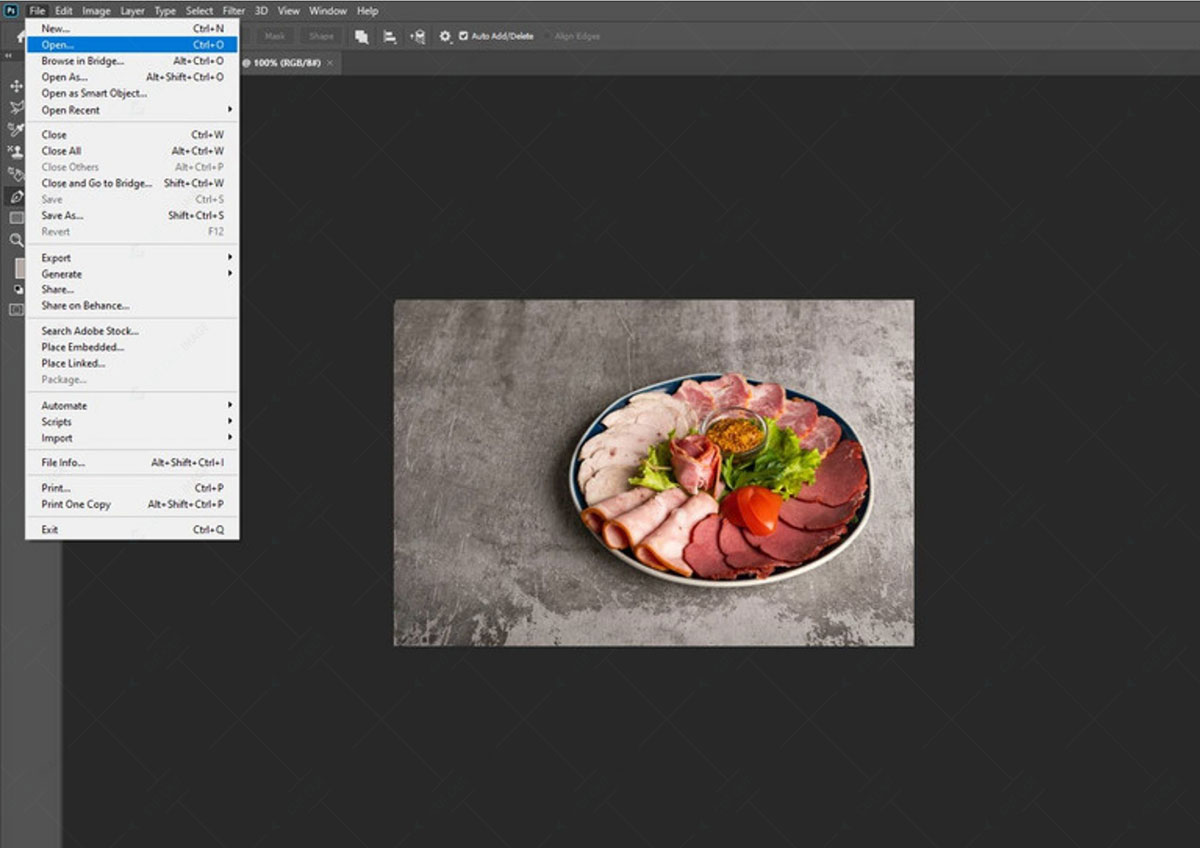
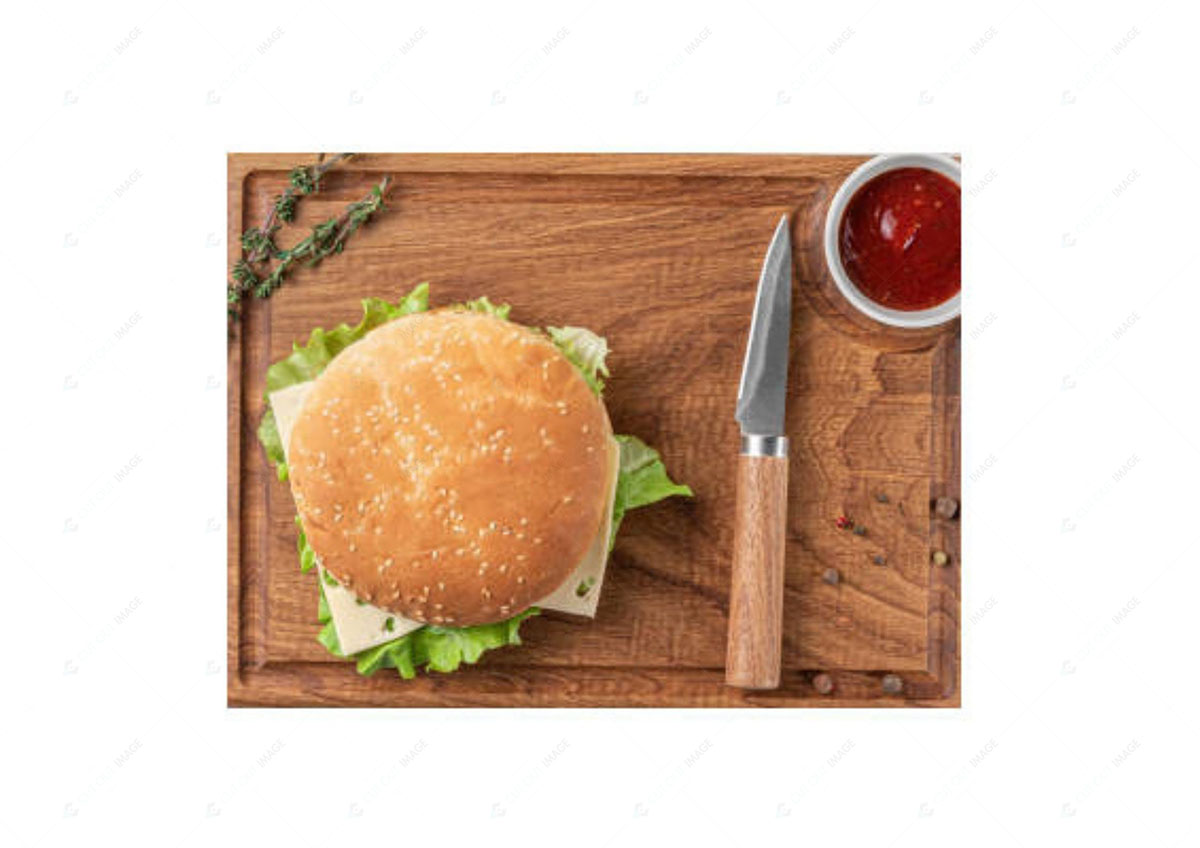
- Open the image in Photoshop.
 This image is for illustrative purposes only. No offense or conflict with any cultural, religious, or social values is intended. All trademarks, logos, & content remain the property of their owners.
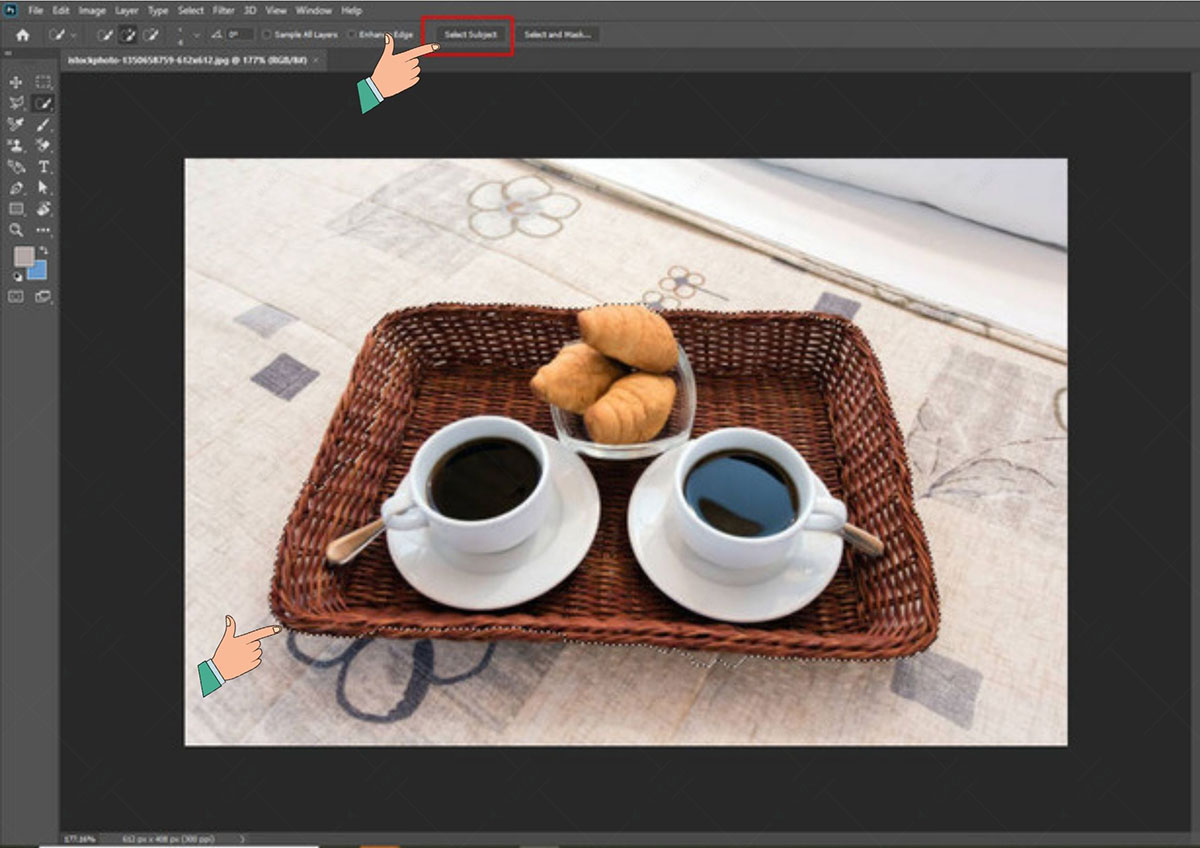
- Go to the ‘Select’ tab from the toolbar and select ‘Subject’ from the available options.
 This image is for illustrative purposes only. No offense or conflict with any cultural, religious, or social values is intended. All trademarks, logos, & content remain the property of their owners.
- Wait for a few moments, and it will automatically select the subject.
- Adjust the selection part using the Lasso Tool or the Quick Selection Tool with Shift and Alt keys to make the selection more precise.
- Cut or copy the selection and paste it into a new document. Use Ctrl+C to copy or Ctrl+X to cut and Ctrl+V to paste.
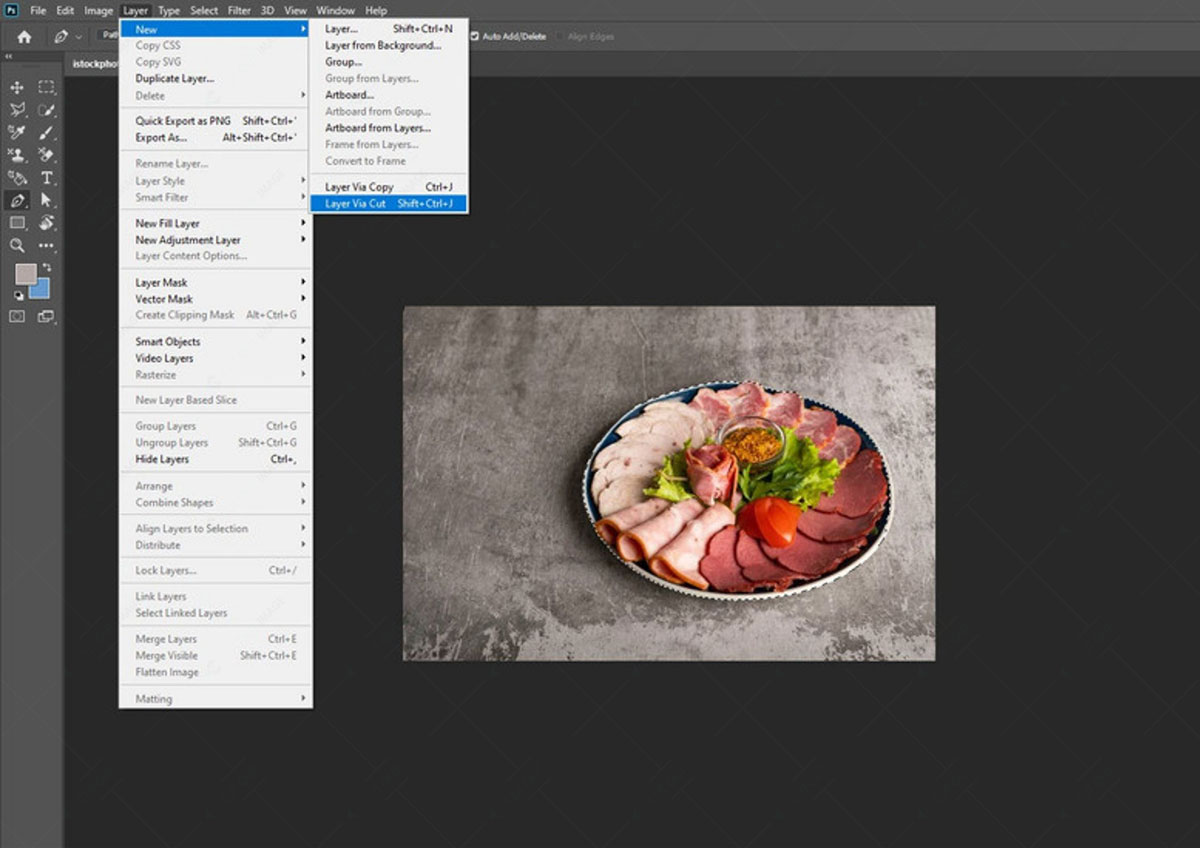
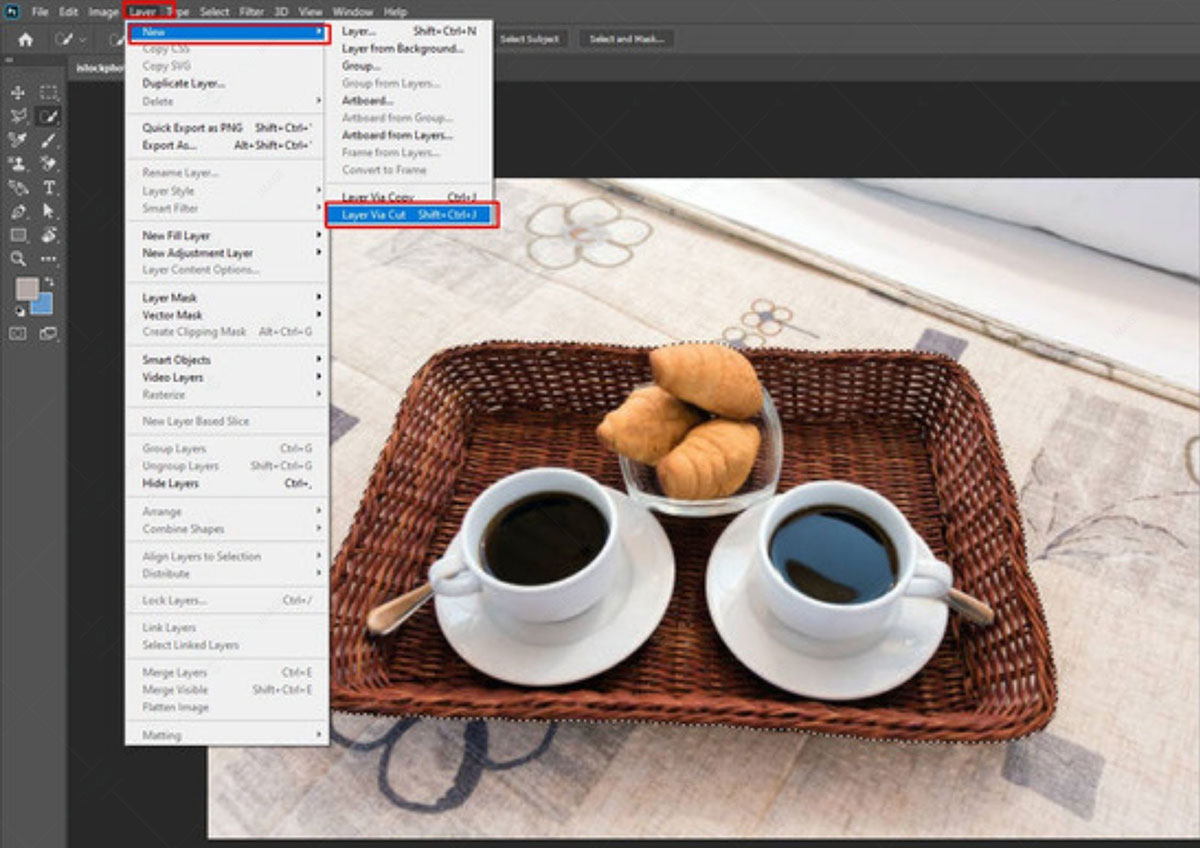
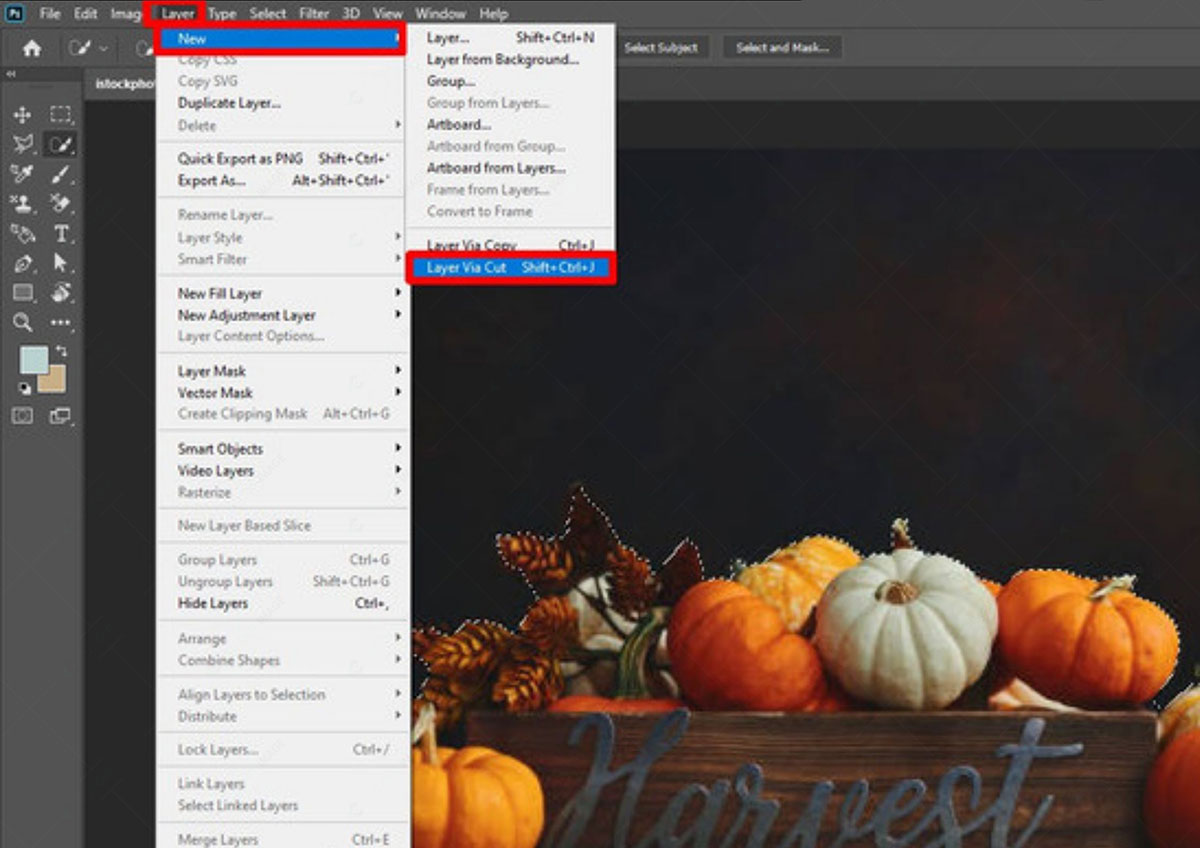
- Alternatively, go to the “Layer” tab from the top menu and select “Layer Via Cut” from the ‘New’ option as Layer>New>Layer Via Cut. It will create a new layer with the selected part.
 This image is for illustrative purposes only. No offense or conflict with any cultural, religious, or social values is intended. All trademarks, logos, & content remain the property of their owners.
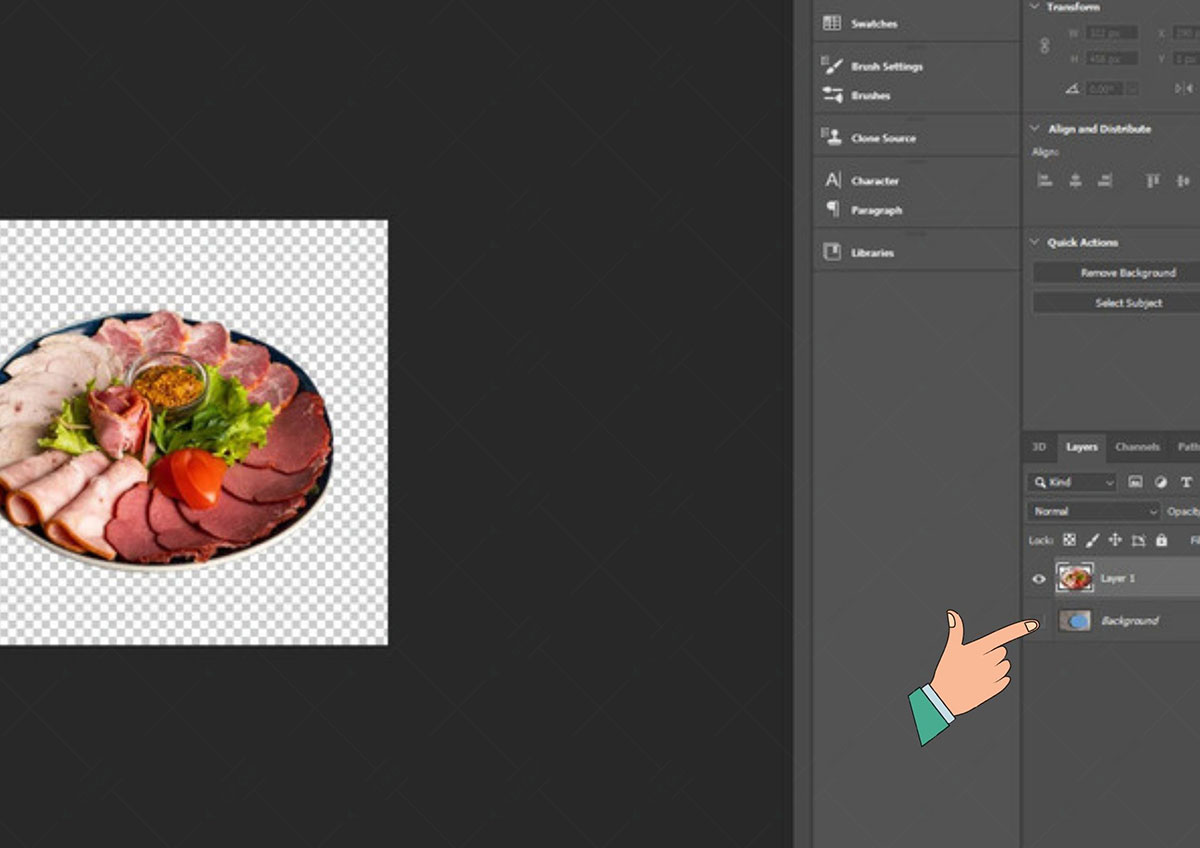
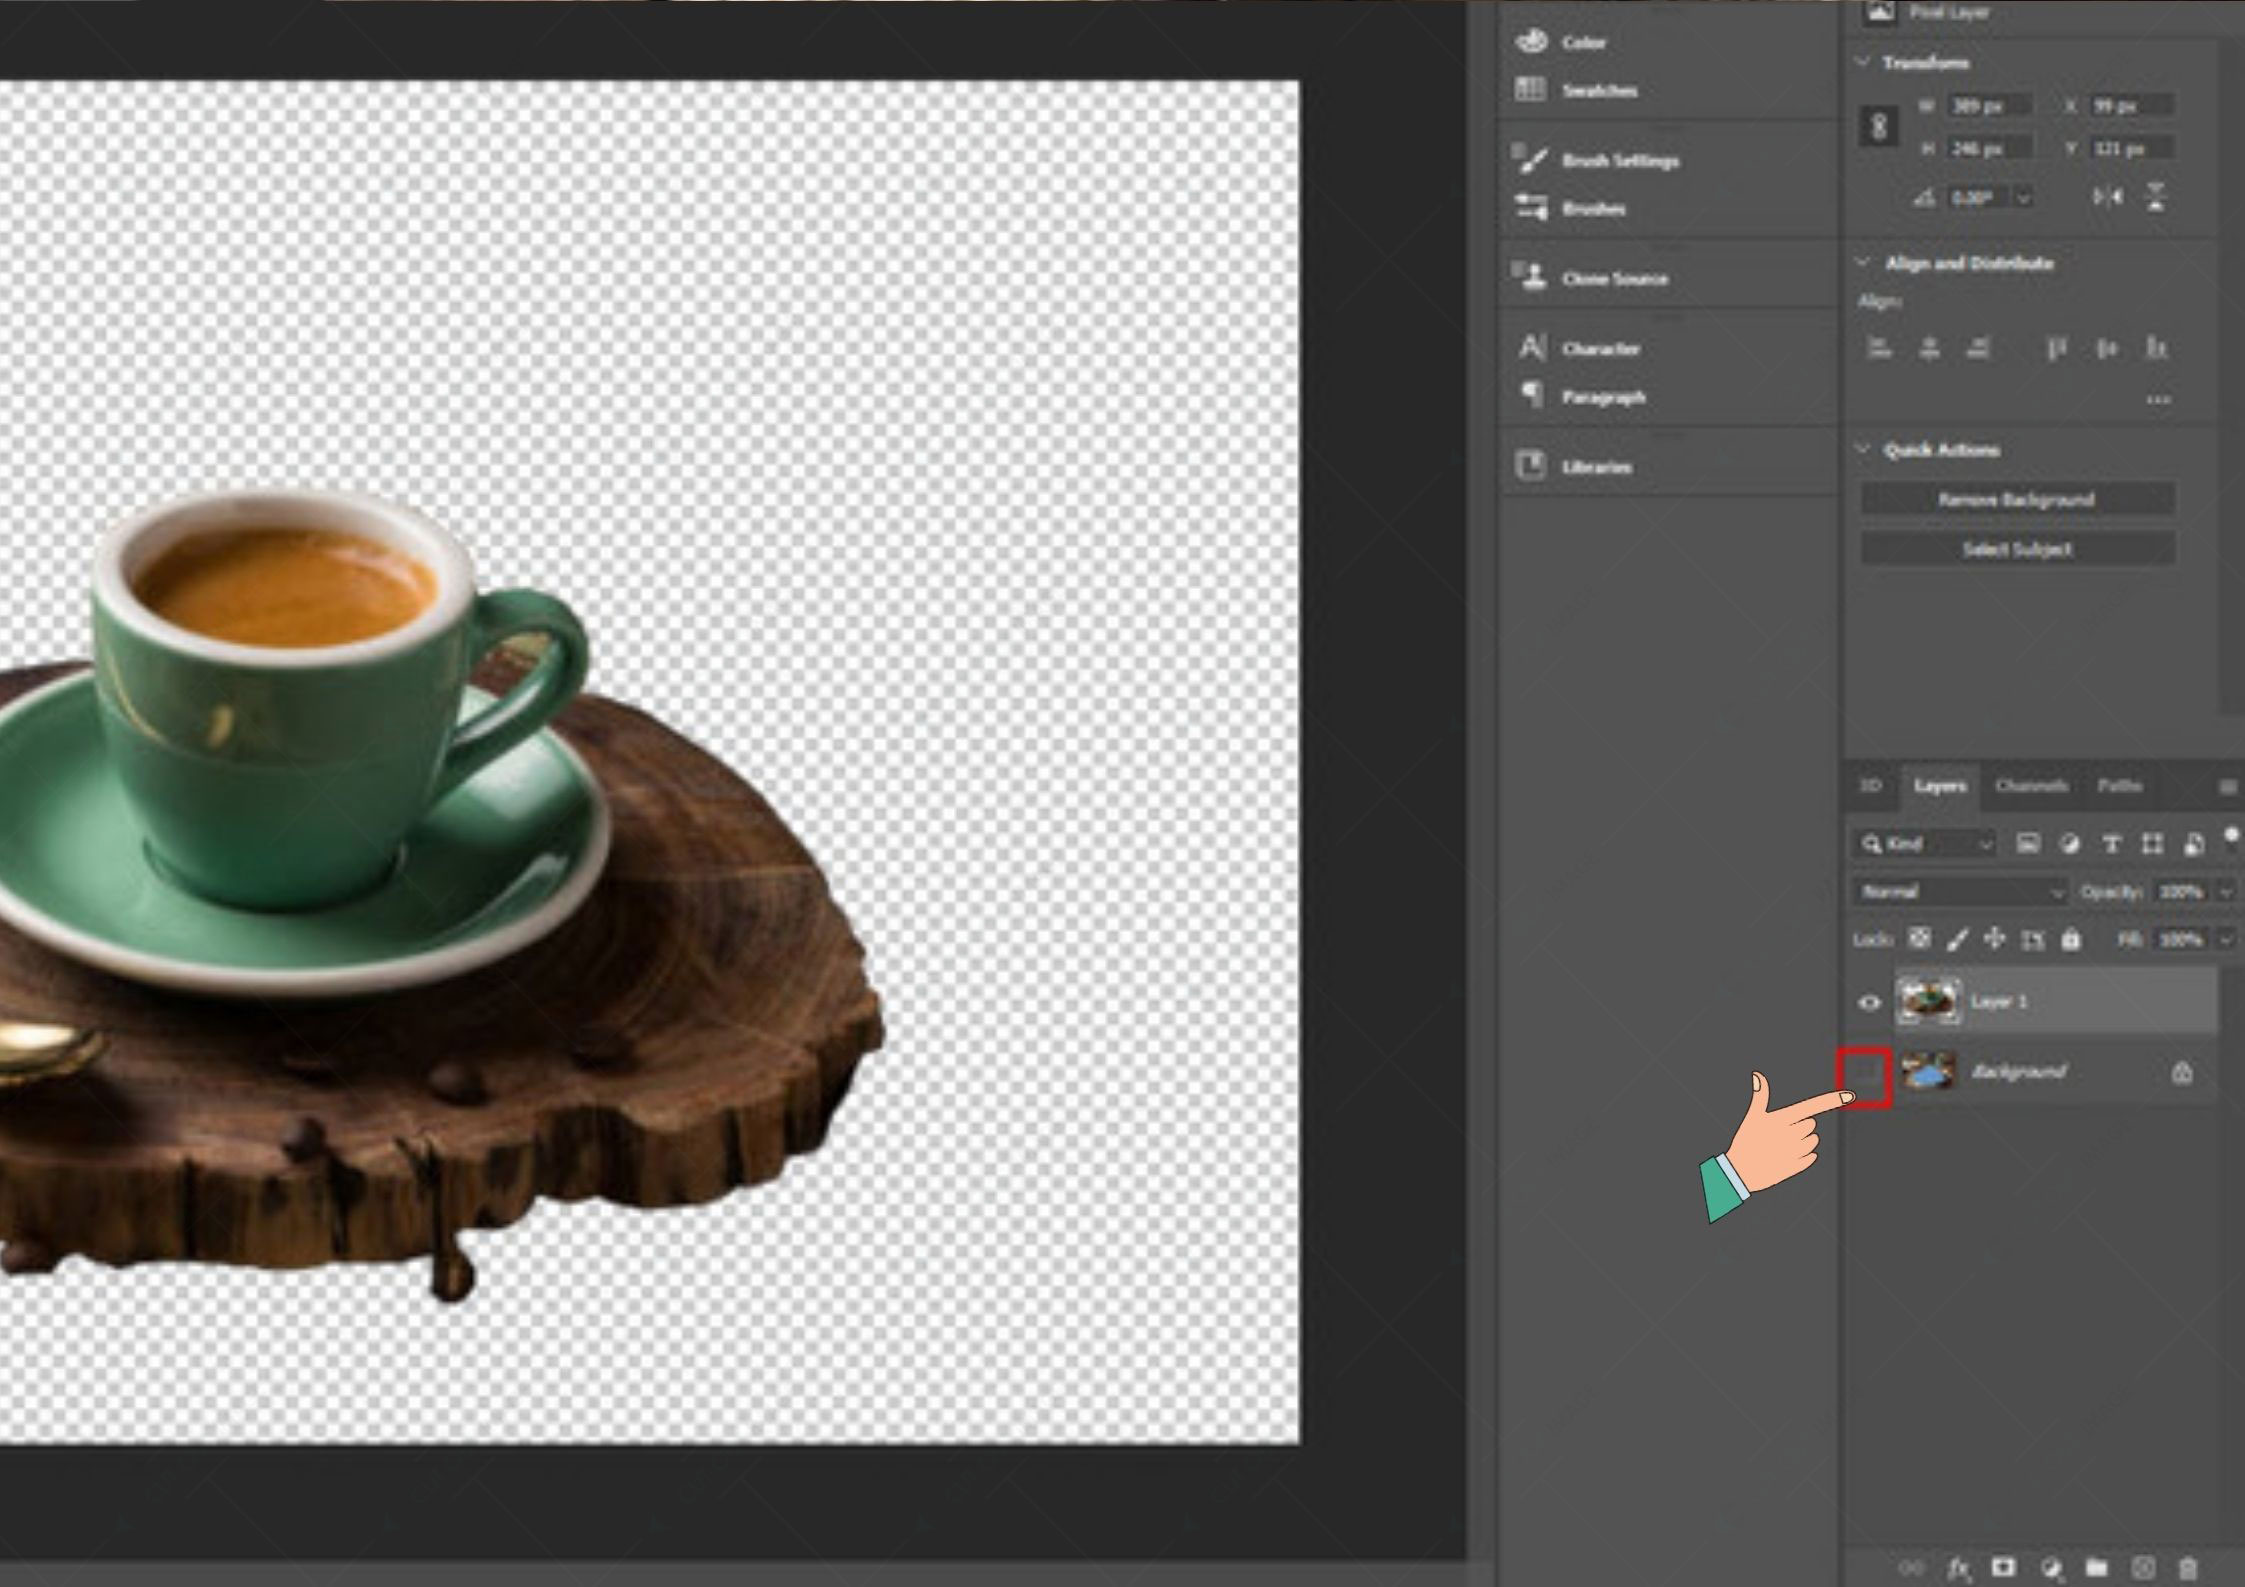
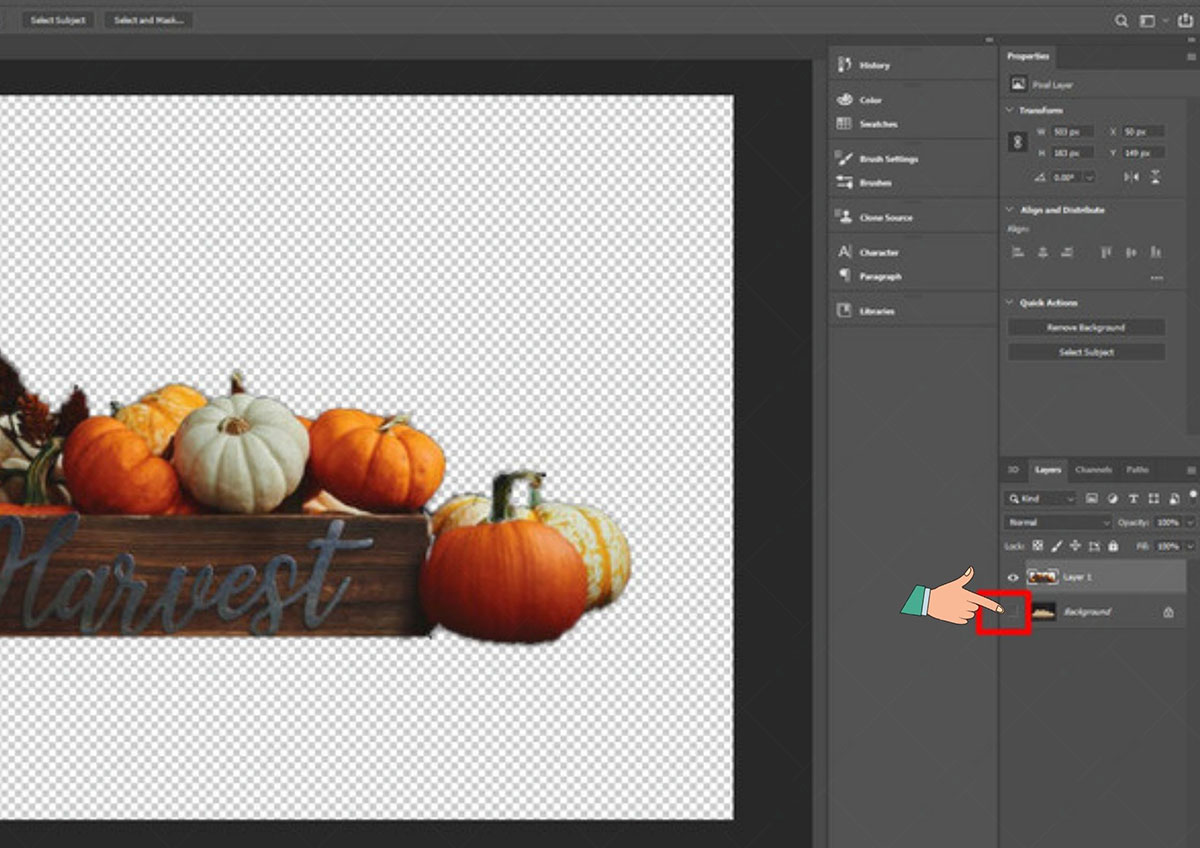
- Clicking on the eye icon of the previous layer will give a clear view of the new layer with a transparent background.
 This image is for illustrative purposes only. No offense or conflict with any cultural, religious, or social values is intended. All trademarks, logos, & content remain the property of their owners.
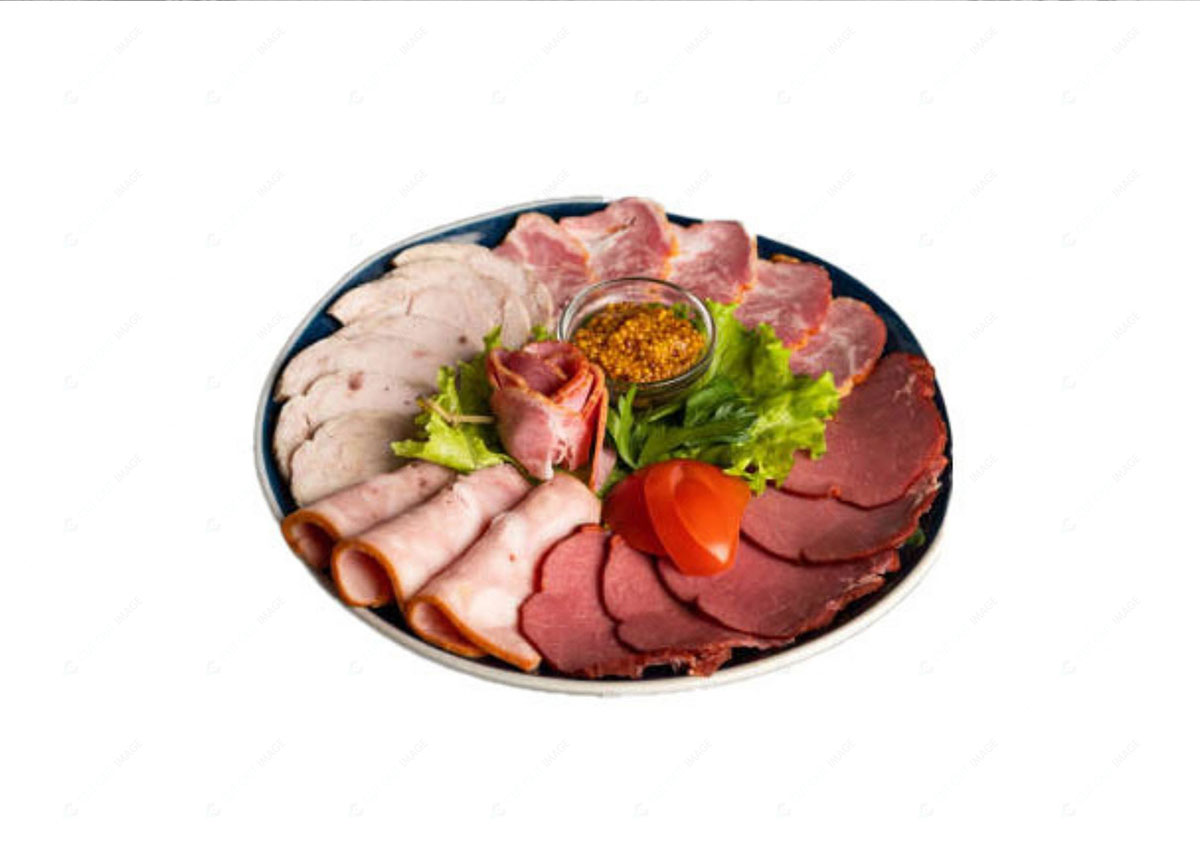
- Save the photo in any format according to your need.
This image is used solely for illustrative purposes. We do not intend to offend or conflict with any societal, cultural, religious, or political values. Image Source: Freepik
Method 2: Cut Out an Image with Inverse
This method is suitable for round-shaped objects, and the steps are as below:
- Opening the photo, unlock the background layer from the right panel.
- Select the Elliptical Marquee tool from the left side tool panel below the rectangular marquee to make the selection in the picture.
- Now outline the object precisely to create the selection.
- Go to the ‘Select’ tab to select ‘Inverse’ from the available options and then click on ‘Remove Background’ from the right side Quick Action panel. It will create a transparent background that you can change the color.
- You can adjust the subject by resizing and moving the object freely to place it perfectly in the frame.
- Save the image by going to the ‘Save As” option from the ‘File’ tab or Ctrl+S as a shortcut.
Method 3: Cut Out an Image with Rectangular Marquee Tool
The Rectangular Marquee Tool is an unpolished method but useful for some design purposes. Here are the steps-
- Load the photo in Photoshop and duplicate the layer
- Select Rectangular Marquee Tool from the left side selection tool panel and make a selection of the part you want to keep as cut out.
 This image is used solely for illustrative purposes. We do not intend to offend or conflict with any societal, cultural, religious, or political values. Image Source: Freepik
- Go to the lower panel and select the ‘Add a mask’ option
 This image is used solely for illustrative purposes. We do not intend to offend or conflict with any societal, cultural, religious, or political values. Image Source: Freepik
- Click on the previous layer’s eye icon. It will display the unselected part with a transparent background.
 This image is used solely for illustrative purposes. We do not intend to offend or conflict with any societal, cultural, religious, or political values. Image Source: Freepik
- Adjust the cut-out part with the move tool from the left side tool panel.
 This image is used solely for illustrative purposes. We do not intend to offend or conflict with any societal, cultural, religious, or political values. Image Source: Freepik
- Save the photo on your device.
 This image is used solely for illustrative purposes. We do not intend to offend or conflict with any societal, cultural, religious, or political values. Image Source: Freepik
Method 4: Cut Out an Image with Lasso Tool
The steps to cut out an image using the Lasso tool are as below:
- Open the image in Photoshop and Unlock the background layer by clicking on the lock icon. It will let you translucent the image.
- You will get two lasso options from the left side panel in the Lasso Tool section- polygonal and magnetic. Here, the polygonal lasso tool can handle sharp-edges. Both polygonal and magnetic tools are like pen tools when making a selection. But if you use the other tool, you can’t release the mouse while selecting, which is problematic to outline precisely.
- While selecting, you can zoom in by pressing ‘Ctrl+’ and zoom out by pressing ‘Ctrl-‘ on the keyboard for a better view of the object’s boundary. Hold the spacebar to move the picture in different directions.
 This image is for illustrative purposes only. No offense or conflict with any cultural, religious, or social values is intended. All trademarks, logos, & content remain the property of their owners.
- After selecting the object, it will automatically convert the path into a dotted line indicating selection.
 This image is for illustrative purposes only. No offense or conflict with any cultural, religious, or social values is intended. All trademarks, logos, & content remain the property of their owners.
- Now go to the “Layer” tab from the top menu and select “Layer Via Cut” from the ‘New’ option as Layer>New>Layer Via Cut. It will create a new layer with the selected part.
 This image is for illustrative purposes only. No offense or conflict with any cultural, religious, or social values is intended. All trademarks, logos, & content remain the property of their owners.
- Clicking on the eye icon of the previous layer will give a clear view of the new layer with a transparent background.
 This image is for illustrative purposes only. No offense or conflict with any cultural, religious, or social values is intended. All trademarks, logos, & content remain the property of their owners.
- Save the photo on your device.
Method 5: Cut Out an Image With the Quick Selection Tool
The Quick Selection tool is one of Photoshop’s most effortless ways to cut out an image. This tool works best when there is a defined edge around your subject. Let’s know the method step by step:
- Open the image in Photoshop and go to the left panel to select Quick Selection Tool.
 This image is for illustrative purposes only. No offense or conflict with any cultural, religious, or social values is intended. All trademarks, logos, & content remain the property of their owners.
- Now you can manually select the subject by outlining it or do it automatically by clicking on ‘Select Subject’ from the top panel.
 This image is for illustrative purposes only. No offense or conflict with any cultural, religious, or social values is intended. All trademarks, logos, & content remain the property of their owners.
- In the case of auto selection, you need to adjust the wrong selection. Use ‘&’ on the keyboard to resize the pointer and hold ‘Alt’ on the keyboard to exclude something from the selection.
 This image is for illustrative purposes only. No offense or conflict with any cultural, religious, or social values is intended. All trademarks, logos, & content remain the property of their owners.
- Go to the ‘Select’ tab and choose ‘Refine Edge’. If you can’t find the option, press ‘Alt+Ctrl+R’ as a shortcut on the keyboard. Adjust the value of Smooth, feather, contrast, and shift edges to refine the edges.
 This image is for illustrative purposes only. No offense or conflict with any cultural, religious, or social values is intended. All trademarks, logos, & content remain the property of their owners.
- After making the selection go to ‘Layer>New>Layer Via Cut’ to create a new layer with the selected part.
 This image is for illustrative purposes only. No offense or conflict with any cultural, religious, or social values is intended. All trademarks, logos, & content remain the property of their owners.
- Clicking on the eye icon of the previous Layer will give a clear view of the new Layer with a transparent background.
 This image is for illustrative purposes only. No offense or conflict with any cultural, religious, or social values is intended. All trademarks, logos, & content remain the property of their owners.
- Save the photo on your device.
 This image is for illustrative purposes only. No offense or conflict with any cultural, religious, or social values is intended. All trademarks, logos, & content remain the property of their owners.
Method 6: Cut an Image Using Color Selection
Using the color selection, we can cut out an image quickly. In this process, you must cover the object with black and the background with white color by adjusting fuzziness. So, here is the way-
- Open the photo in Photoshop and unlock the background layer.
- Go to the ‘Select’ tab and pick the ‘Color Range’ option. A pop will appear in black and white that you need to adjust.
- Select ‘Sampled Colors’ on the top and ‘Add to Sample’ named eyedrop above the ‘Invert’ option.
- Click on the background Area with the eyedropper, and the background will be white. Now lower the fuzziness, and it will make the object darker.
- Press ‘Enter’ on the keyboard, and it will make the selection outlining the object.
- Do adjustments to correct the selection.
- Now press “Delete” on the keyboard to cut out the image with a transparent background. You can change it into any solid color.
 This image is for illustrative purposes only. No offense or conflict with any cultural, religious, or social values is intended. All trademarks, logos, & content remain the property of their owners.
- Finally, you have cut out the image and now save it by positioning correctly with the position tool.
 This image is for illustrative purposes only. No offense or conflict with any cultural, religious, or social values is intended. All trademarks, logos, & content remain the property of their owners.
Method 7: Cut an Image With a Layer Mask
Here is the step-by-step process of cutting out an image with Layer Mask in Photoshop –
- Open the photo in Photoshop and unlock the background layer.
- Select the object using any selection tool based on the shape and complexity of the object. Here I have used the Quick Selection Tool.
- Press’ Ctrl+Shift+I’ to switch the selection object to the background.
- Go to the bottom of the layer panel and select the ‘Add a mask’ option while pressing the ALT key simultaneously. It will remove the background with transparency.
- Using the move tool, you can now move and resize the object. Now you can change the background with color or keep it transparent.
- Finally, the image is cut out, and you can save it.
Method 8: Cut Out an Image with Select and Mask
Select and Mask tool is the replacement for Refine Edge that you can use for the selection process. Let’s learn how to cut out an image with Select and Mask:
- Open the photo in Photoshop and unlock the layer by clicking on the lock icon of the layer.
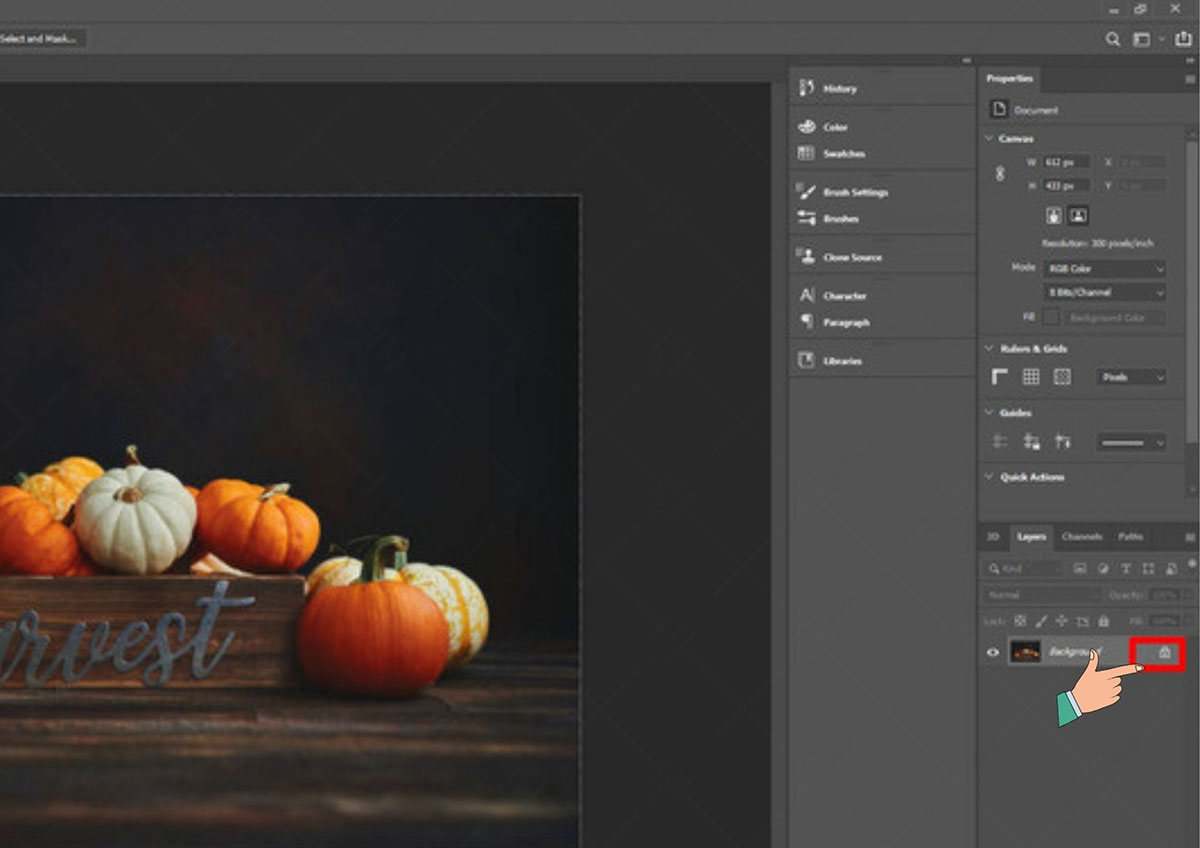 This image is for illustrative purposes only. No offense or conflict with any cultural, religious, or social values is intended. All trademarks, logos, & content remain the property of their owners.
- Select the subject using any selection tool. Here I am using the quick selection tool. You can use other selection tools like subject selection, Magnetic Lasso, or Polygonal Lasso.
- Go to the ‘Select and Mask’ option from the top bar.
- It will show a Properties panel workspace on the right side to adjust your selection. On the top of the properties panel, you will find the view option. Change the view option to Black and white.
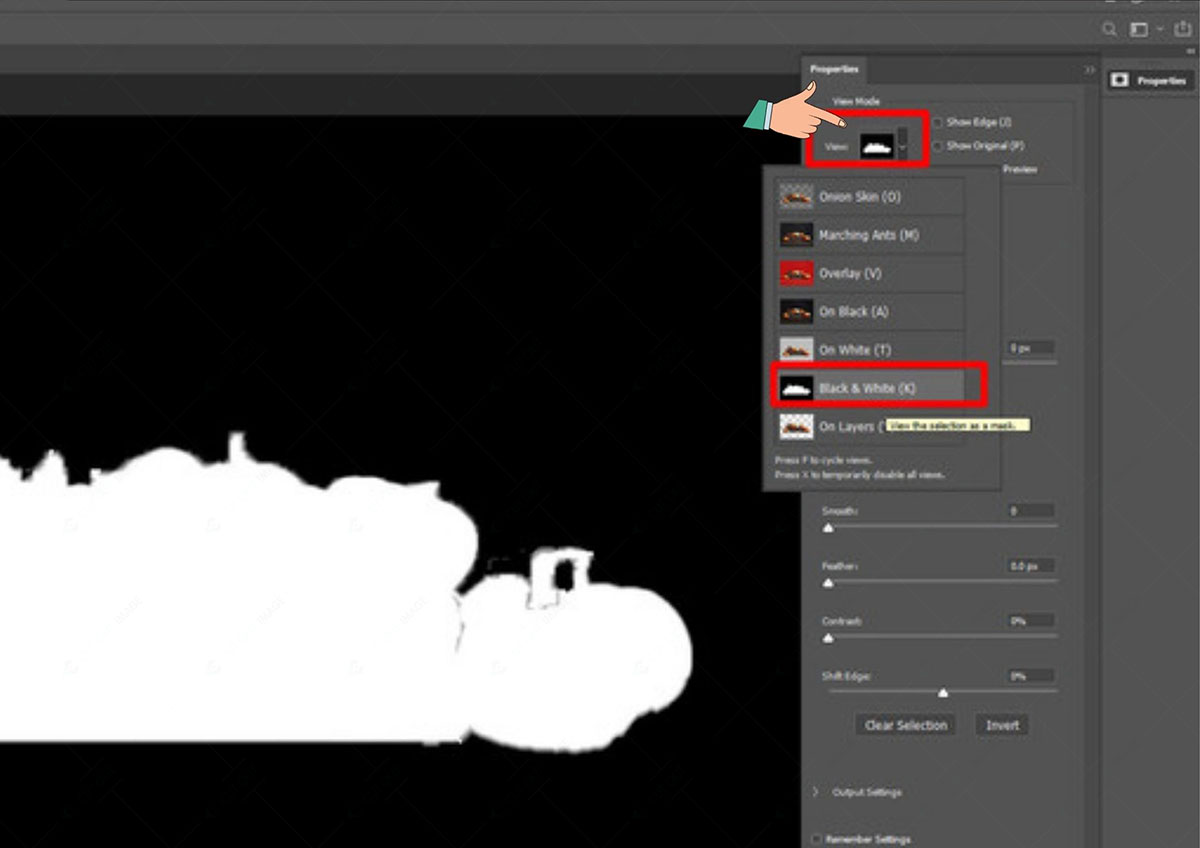 This image is for illustrative purposes only. No offense or conflict with any cultural, religious, or social values is intended. All trademarks, logos, & content remain the property of their owners.
- Choose the refined edge brush tool from the left side toolbar and adjust the size. Alternatively, you can use the Properties panel sliders of Radius, Smooth, Feather, or contrast to refine the selection edges.
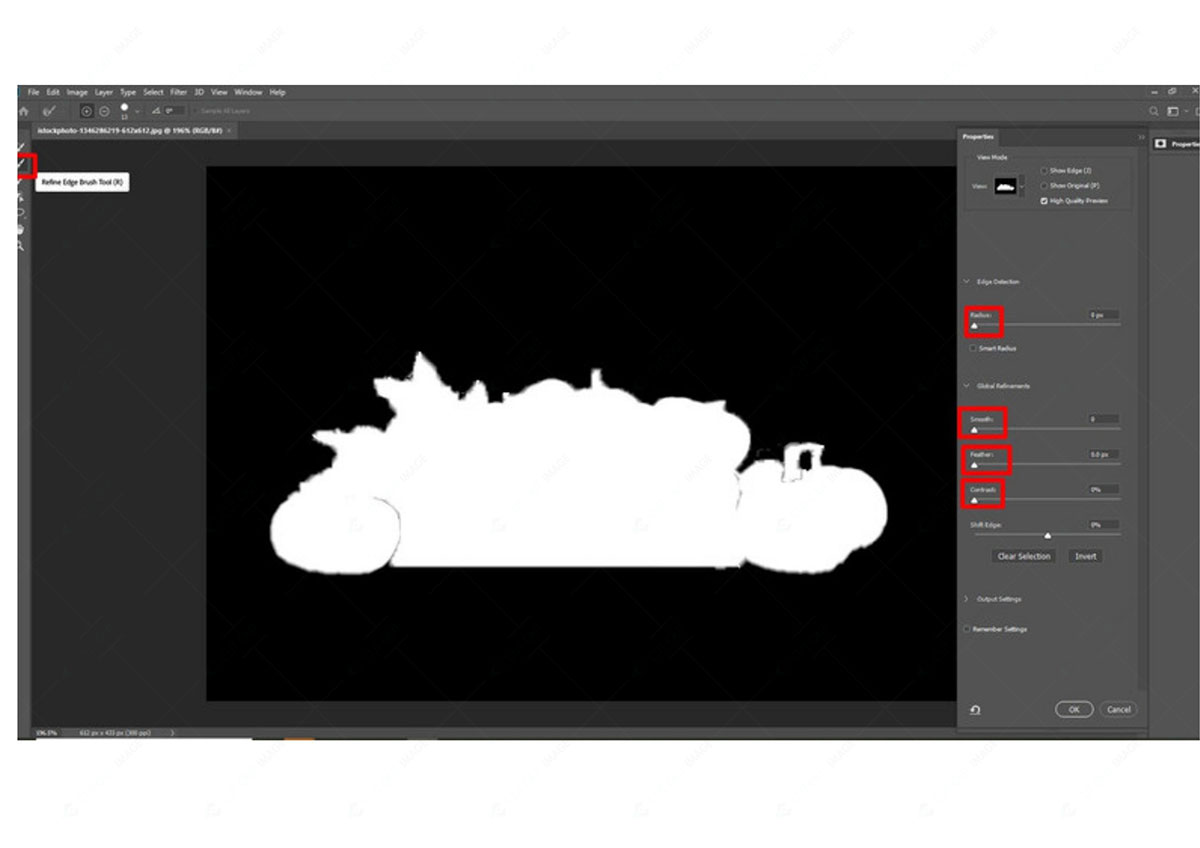 This image is for illustrative purposes only. No offense or conflict with any cultural, religious, or social values is intended. All trademarks, logos, & content remain the property of their owners.
- After making all the adjustments, click on the ‘Ok’ button. Select and Mask workspace will close.
- Now go to ‘Layer>New>Layer Via Cut’ to generate a new layer with the selected part.
 This image is for illustrative purposes only. No offense or conflict with any cultural, religious, or social values is intended. All trademarks, logos, & content remain the property of their owners.
- Click on the previous slide eye icon and you can see the cut out image with transparent background.
 This image is for illustrative purposes only. No offense or conflict with any cultural, religious, or social values is intended. All trademarks, logos, & content remain the property of their owners.
- Save the image with any preferred background.
Method 9: Cut Out an Image Pen Tool
The pen tool is a popular photo-cutting tool used for clipping path services. You can use this tool to cut out any subject. Here is the process of using the pen tool to cut out an image from a background:
- Open the photo in Photoshop and duplicate the layer by pressing ‘Ctrl+J’ on the keyboard.
- Go to the left side tool panel and select the pen tool displayed as a pen icon.
- With the pen tool, outline the subject by zooming in and out. Finish at the start point.
- Go to the right-side properties panel and click on the ‘Path’ tab. Right-click on the path tab layer and select ‘Make Selection.’
- pop-up will appear. Just click ‘OK.’ The subject will be selected.
- Click back to the ‘Layer’ tab in the properties panel and click on ‘create a new group,’ the folder icon to make a folder. Then click on the rectangular icon beside it to add a vector mask.
- Now Invert the layer by clicking on the ‘Invert’ option or pressing ‘Ctrl+Shift+I.’ Then click on the circle icon beside the folder to set the background color.
- Select the solid color option and set the background color.
- Finally, you have cut the image. Now it’s time to save. If you want to keep the background transparent, save it in PNG format; otherwise, you can save it in your preferred format.
Method 10: Cut Out an Image With Channels
Photoshop’s Channel feature breaks down an image into 3 color channels: Red, Green, and Blue representing variable contrast layers. You can handgrip the contrast to create accurate selections to cut out pictures in Photoshop. Let’s know the process step by step:
- Open the photo in Photoshop and duplicate the layer.
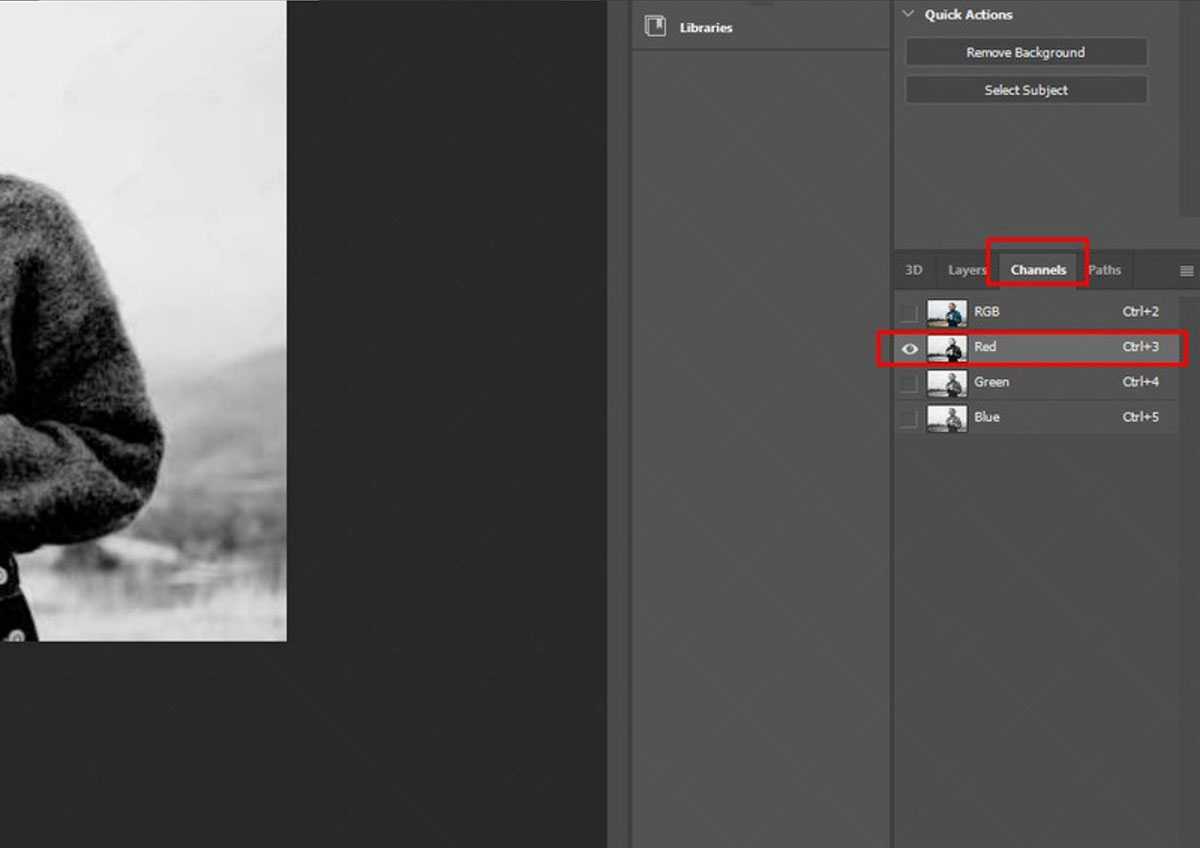
- Go to the Channel tab from the right-side Layer Panel. Alternatively, select ‘Channels’ from the ‘Window’ tab of the top bar.
- Here, Red, Green, and Blue layers display different levels of black and white contrast along with the RGB layers. Click on each layer to see the contrast level. In this example, Red is the most contrast level.
 This image is for illustrative purposes only. No offense or conflict with any cultural, religious, or social values is intended. All trademarks, logos, & content remain the property of their owners.
- Select the most contrasted layer and drag it to ‘Create new channel’ located in the below panel to create a new layer with a copy of it.
- Now press ‘Ctrl+L’ on the keyboard for PC or ‘Command+L’ for MAC for the adjustment layer. After that, raise the highlights and shadows until your image is entirely black and white. Ensure clean edges around the subject. After a satisfactory adjustment, click ‘OK.’
- Take the Brush tool from the left side of the toolbar or press B on the keyboard to refine the black-and-white areas.
- Click on the copy layered, holding the Ctrl key on the keyboard that will automatically select the subject. Adjust the selection if needed.
- Click on the Layer tab and select the layer you want to cut. Then click on the layer mask icon to apply your selection onto a layer mask.
- It will use a selection on your layer mask to cut the photo. Click on the previous layer’s eye icon to see the cut out image.
 This image is for illustrative purposes only. No offense or conflict with any cultural, religious, or social values is intended. All trademarks, logos, & content remain the property of their owners.
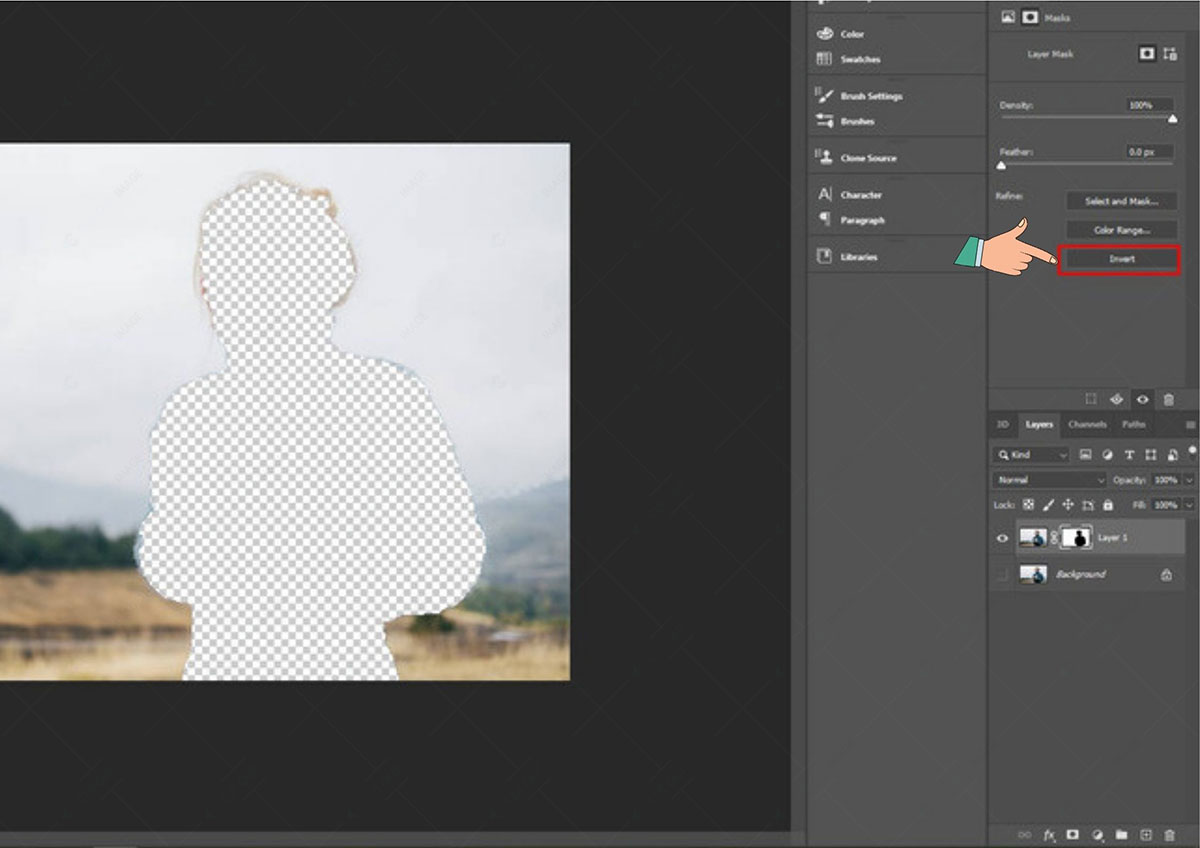
- If the opposite of your expected results appears, press Ctrl+I or click on ‘Invert’. Your subject will be cut out with a transparent background.
- Now save the photo.
Method 11: Cut Out an Image with Background Eraser Tool
Background Eraser Tool erases the image part that you drag and make the erased part transparent. Let’s know the steps to cut out an image using this background eraser tool:
- Open the picture and duplicate the layer by pressing Ctrl+J on the keyboard.
- Select the Background Eraser Tool from the left side toolbar and select Background Eraser Tool from the options.
- Adjust the size from small to large according to need. Remember, the larger size brush removes quickly, whereas the smaller brush with increased hardness works best for more furry edges.
- Now click on the previous slide’s eye icon to see the removed part and start brushing over the picture part you want to remove by zooming in-out. It will make the erased part transparent.
- Closely zoom in and out to remove every pixel properly to ensure proper cut out.
- Now go to ‘Layer>New>Layer Via Cut’ to generate a new layer with the selected part.
- Click on the previous slide eye icon and you can see the cut out image with transparent background.
- Save the image with any preferred background.
Advantages of Cut Out Images? [ How to Cut Out an Image in Photoshop ]
The background is a crucial part of an image that ruins a fantastic shot if it is distracting. However, you can save the photo from being destroyed by applying the cut out image process and replacing it with a new background. Check the photos below, which one looks good?
 This image is for illustrative purposes only. No offense or conflict with any cultural, religious, or social values is intended. All trademarks, logos, & content remain the property of their owners.
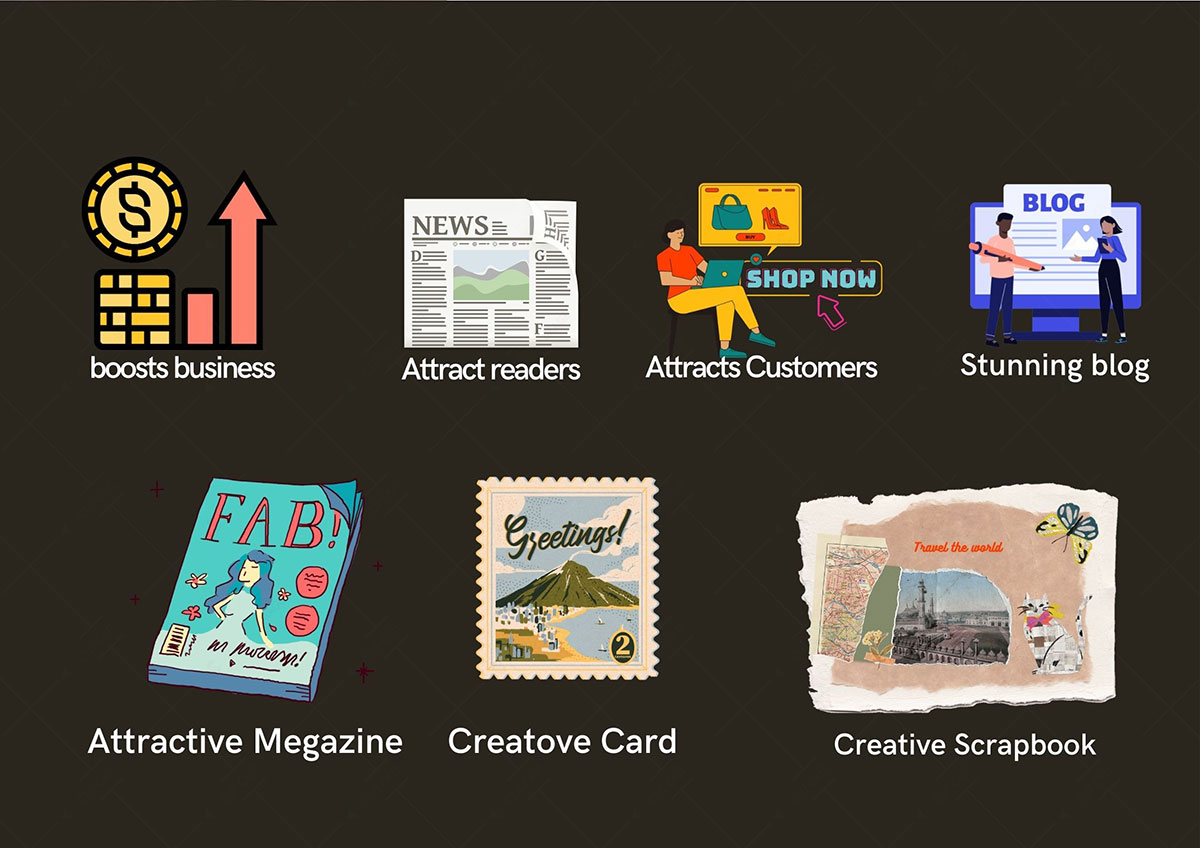
Cut-out images are now like meat and potatoes for E-commerce businesses, photographers, marketers, fashion houses, and magazine publishers for multiple purposes. One of the benefits of cut out images is that you can use the cutout part again and again. A few more advantages of cut out images are as below:
- It boosts business by attracting buyers online with professionally enhanced objects in clean backgrounds.
- Journalists use cut-out images to make their articles or blogs attractive.
- It lets the business holder display each part of the product precisely with the proper background for different market platforms like Alibaba, Amazon, eBay, Etsy, etc.
- It helps marketers to design new marketing posts, social media content, blogs, or catalogs without reshooting.
- It enhances the model styles in newspapers, magazines or catalogs that attract viewers and makes the photo memorable.
- Cut out images are beneficial for personal use also. You can cut out your image to place in a new background, collage magazine, or . You can cut out flowers, bugs, cars, people, etc., from different images and add them to your photo, poster, or collage to make it fantastic and creative.
 This image is for illustrative purposes only. No offense or conflict with any cultural, religious, or social values is intended. All trademarks, logos, & content remain the property of their owners.
Besides Photoshop, plenty of other software is available to cut out images that require professional skill to get professional output. If you don’t want to compromise the quality, you can Buy Background Removal Service at Cut Out Image, which will save time and ensure professional results.
Who uses cut out image?
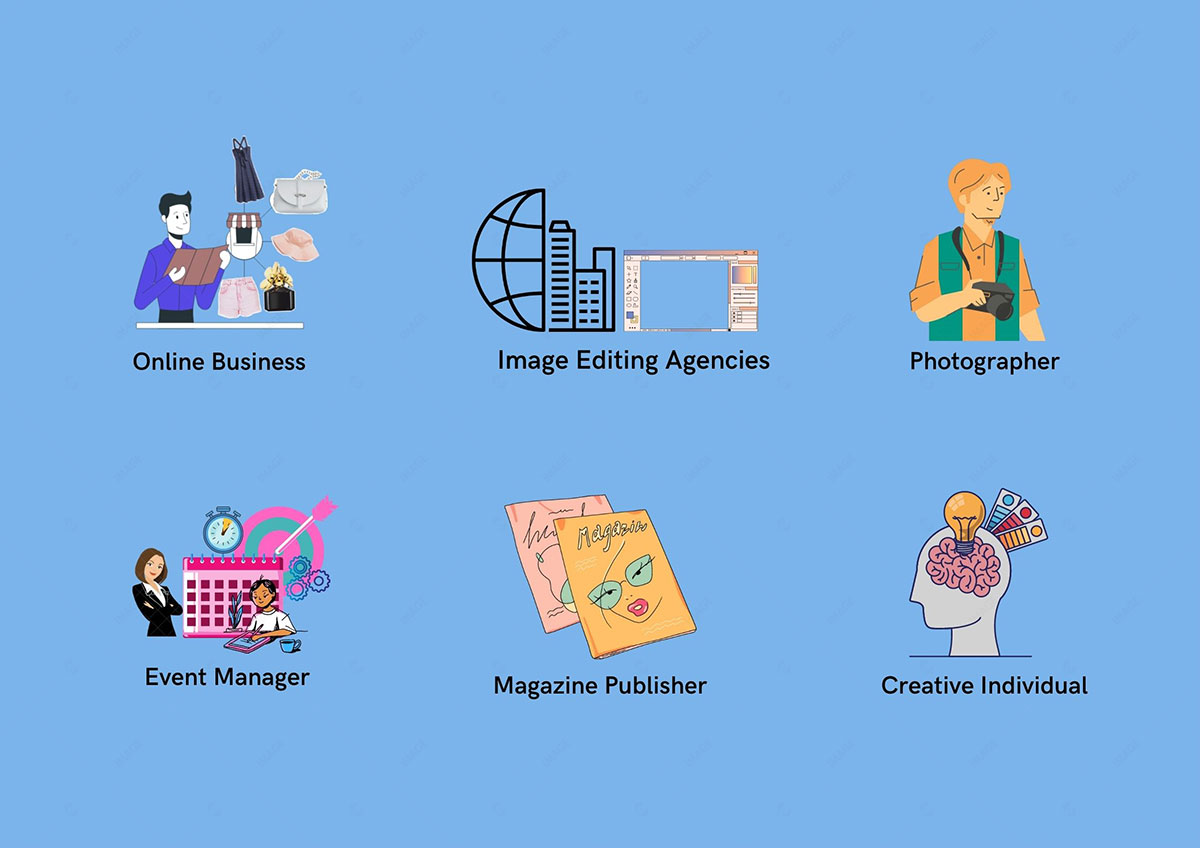
Cut out images are highly demanded in today’s digital world. Online businesses and other sectors highly require the service for multiple purposes. Let’s know who uses the cut out image primarily-
- Online Business: Who can think of an online business without a photo? Cut out image is a must for online business since different market platforms require different backgrounds. Online business holders look for cut-out images to avoid capturing the same picture with a diverse background. It aids in replacing products with appropriate White Background Aesthetics or Plain Background Colors.
- Image Editing Agencies: You can call the cut out image the base foundation for photo retouching. The photo artist uses the cut out image to retouch photos and manipulates creative ideas.
- Photographer: Photographers sometimes need to shape their photos according to the client’s request, and they need to cut out image service or do it themselves. They also utilize the cutout image process to enhance the subject and make the photo perfect.
- Event Manager: Event managers mainly demand the cut out images to decorate the event according to the theme. They utilize cut out pictures to decorate the background based on the theme.
- Magazine Publishers: Magazine publishers publish different articles that need cut out images on various topics. Journalists often create pieces on celebrities displaying their stunning photos with no background or suitable background resulting from cut-out image service.
- Creative Individual: We often make scrapbooks, memory cards or other innovative items where we need photos. We can only use a part of the photo or some background that might seem unfit. In such cases, an individual creative needs cut out images to make the scrapbook, memory book or cards creative and beautiful.
 This image is for illustrative purposes only. No offense or conflict with any cultural, religious, or social values is intended. All trademarks, logos, & content remain the property of their owners.
Tools to Cut Out an Image in Photoshop
Photoshop is a fantastic addition to the photography world. It comes up with a bunch of options to cut out the image. Let’s know a few tools in Photoshop to cut out the image.
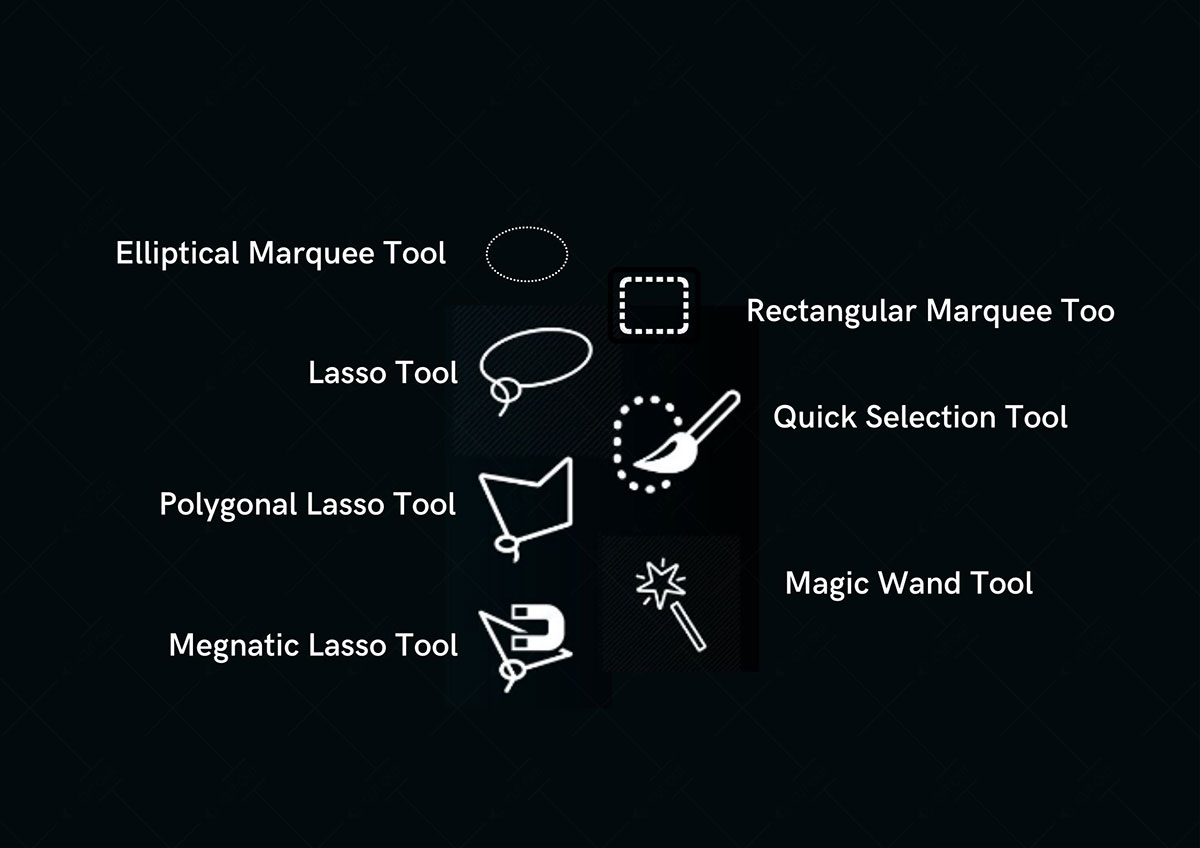
01. Selection Tool:
The selection tool is like a precision blade that draws boundaries surrounding the object. A good selection ensures a good outcome. Photoshop comes with multiple selection tools like Rectangular Marquee Tool, Elliptical Marquee Tool, Lasso Tool, Polygonal Lasso Tool, Magnetic Lasso Tool, Quick Selection Tool, Magic Wand Tool etc.
 This image is for illustrative purposes only. No offense or conflict with any cultural, religious, or social values is intended. All trademarks, logos, & content remain the property of their owners.
02. Magic Wand Tool:
As the name suggests, it works like magic to improve image quality. However, it’s a complicated tool to cut out the image, but you can overcome it by practicing.
03. Quick Selection Tool:
Quick Selection Tool is the better version of the Magic Wand Tool. It is like a brush to cut out the image by clicking on a specific area and replacing it with a new background.
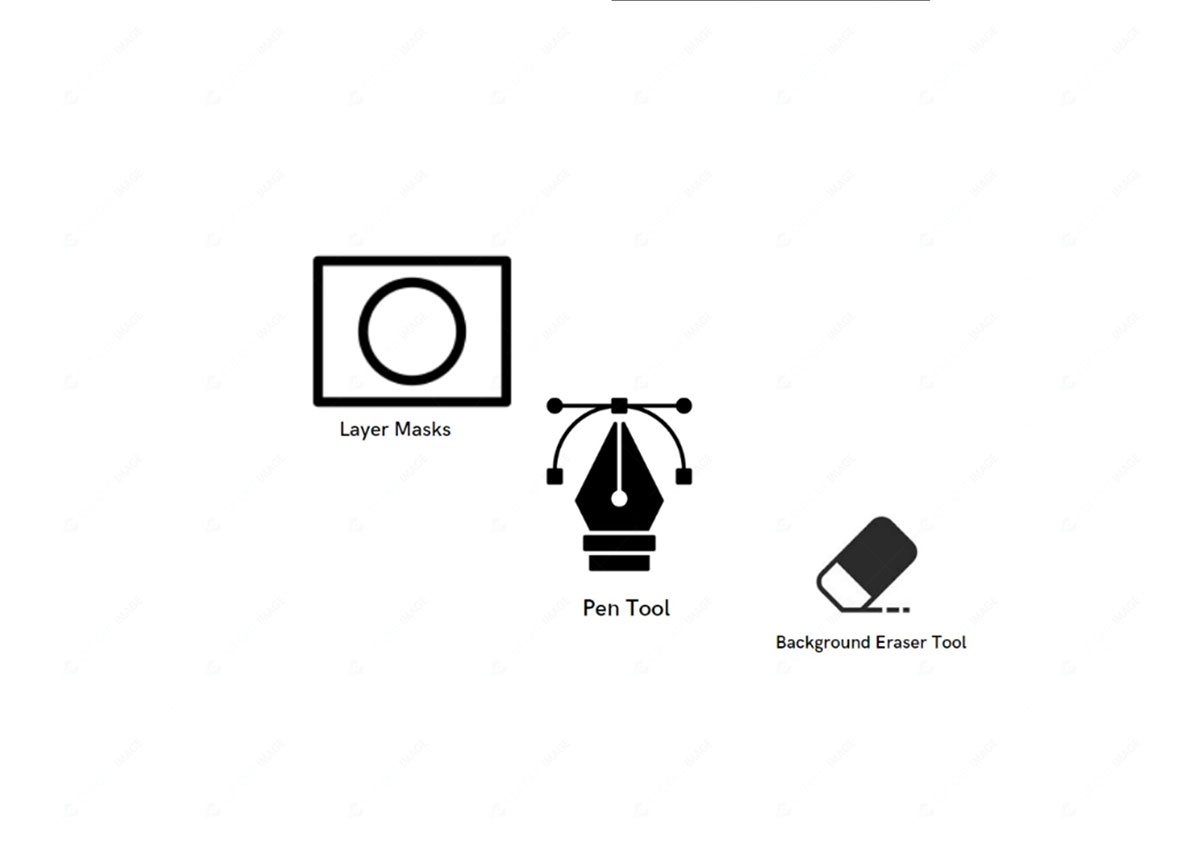
04. Layer Masks:
Layer Masks in Photoshop acts like a piece of paper that barricades everything under the layer. With the selection tool, you can select the portion of an image that you want to isolate from cutting. While selecting, you will find two colors- black and white. Black hides everything under it, while white shows it.
05. Pen Tool:
The broadly used flawless edge photo-cutting tool is the pen tool, which is simple to start but demands practice for effective results. You can cut the image using the Pen tool in different ways. It best cuts out curved edges or objects against problematized backgrounds.
06. Background Eraser Tool:
Photoshop’s one fantastic tool is the Background Eraser Tool, which is great for perfect image cut out. It erases the pixels on the selected layer part, making the background transparent. You can find it as an eraser icon in the left-side toolbar.
 This image is for illustrative purposes only. No offense or conflict with any cultural, religious, or social values is intended. All trademarks, logos, & content remain the property of their owners.
Photoshop Alternative to Cut Out Image
I have now discussed Photoshop software to Cut Out an Image. However, you can utilize your phone also to do the same using the background removal app. You can find AI background remover apps specialized in photo cut out. Let’s have an idea about such apps below:
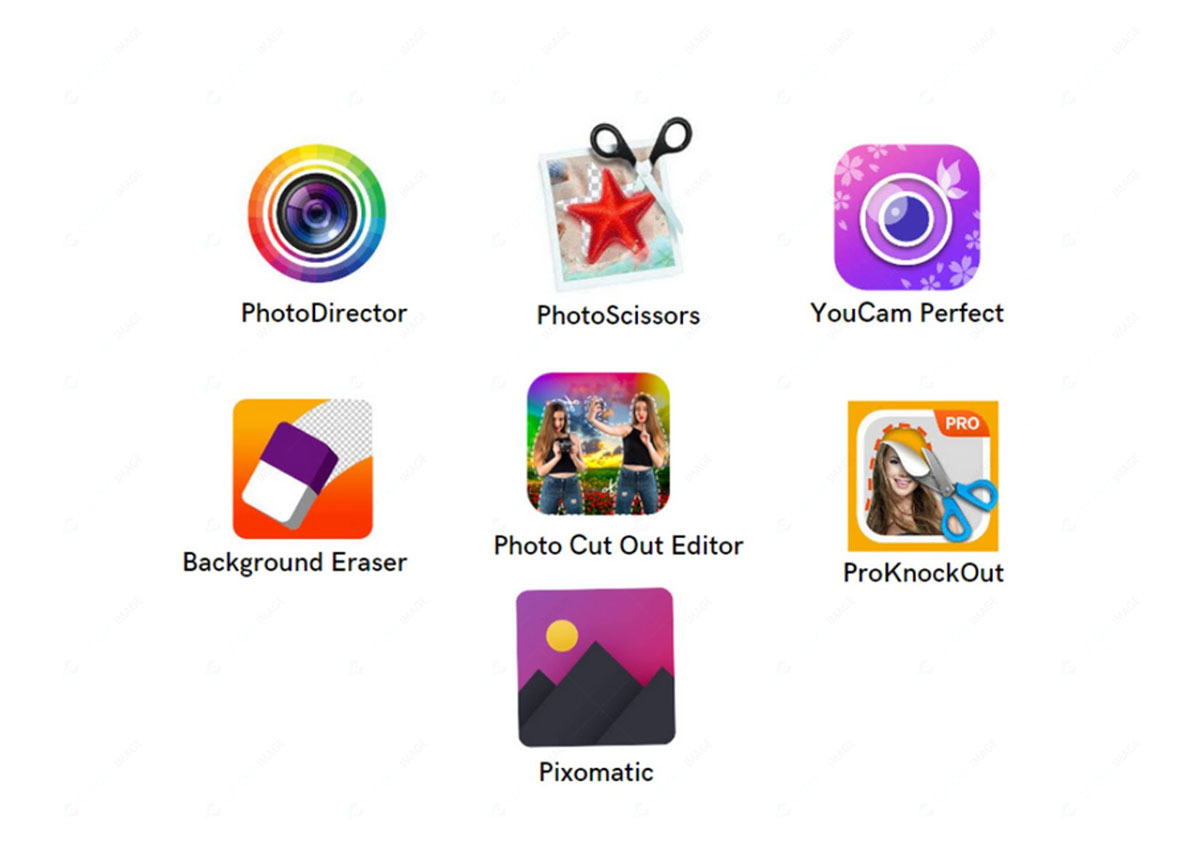
PhotoDirector: PhotoDirector is a popular AI and advanced photo editing tool to cut out an image, create visual effects and create collages. Using it is like a five-finger exercise for novices and specialists. You can apply filters, effects, text, and frames to make the photo more attractive.
PhotoScissors: Teorex developed the PhotoScissors app to remove the background from an object and replace it with a suitable background like transparent, white or colorful. You can use it online, install it from the app store for free with limited regular benefits, or buy it with unique features. Using PhotoScissor to cut out an image is like child’s play.
YouCam Perfect: YouCam Perfect is one of the most popular glamorous photo editor apps. Using it, you can also cut out an image and paste it into different backgrounds.
Background Eraser: Using the Background Eraser app, you can erase the background and make it transparent. It is easy to use and allows beginners to cut out an image quickly with limited features.
Photo Cut Out Editor: Photo Cut Out Editor is the best manual selection tool to cut out an image effortlessly. It offers both a manual and smart selection to cut out a picture. It also has 100+ background templates, filters, and effects of shadow, cartoon, blur etc., to make your photo fantastic.
ProKnockOut: If you are looking for various image cut-out options, ProKnockOut can help you. It is a photo cut out app with multiple cutting options. Beginners can use this app easily and create PNG photos with different background templates, stickers etc.
Pixomatic: It is a fantastic app to cut out images that let you cut out subjects or remove unwanted objects from the background. It’s free with limited options and offers numerous features with the paid version.
 This image is for illustrative purposes only. No offense or conflict with any cultural, religious, or social values is intended. All trademarks, logos, & content remain the property of their owners.
Suggestion on Cut Out Image tool in Photoshop
Photoshop is like the magic lamp to the photo artist. It comes with various tools to cut out images that might confuse you when selecting a tool for your project. Don’t worry because I will make it clear to you.
Some photos appear with hairy edges, and others with simple edges. Therefore, Photoshop’s tools to cut out images have particular uses depending on the image’s complexity and purpose.
- The pen tool is the best choice for hard and sharp edges objects. It is a manual process that accurately selects the object.
- The rectangular Marquee tool is ideal for rectangular shape objects.
- The elliptical marquee tool is suitable for oval shape objects.
- The color range tool will be a wise choice in the case of a soft-edged object.
- The Layer mask method is helpful for furry objects where the Refine Edge tool makes the hairy edges smooth.
- The Polygonal Lasso tool is ideal for straight-lined geometric shapes like books, photo frames, etc.
- You can combine the Lasso and Quick Selection tools to cut out a complex subject.
Final Thought [How to Cut Out an Image in Photoshop]
Cutting out an image might sound easy but tricky to execute in Photoshop. Hopefully, this blog has taught you multiple ways to Cut Out an Image in Photoshop. You can apply these methods to create eye-catching photos according to your purpose. Start with simple and practice to do your best.
If you need professional results but lack time and skill for Image Post Production Service, you can outsource the service from Cut Out Image. Their hotshots are always ready to serve you the best at an affordable price.
If you find this blog helpful, you might also read the below blogs:
- Cherry Blossoms Background
- How to Fix an Overexposed Photo
- How To Wrap an Image in Photoshop
- How to create a gradient in photoshop
- Action Camera Body Mount